
Lavender Hill Mob, The
Date: 1951
Director: Charles Crichton
Production Company: Ealing Studios
Stars: Alec Guinness, Stanley Holloway, Sid James, Alfie Bass
Location(s): London, Middlesex, Paris (France)
Region(s): France, London H-L, South East E-L
Storyline:
An unassuming bank clerk who is responsible for the shipment of bullion between refinery and bank bides his time for almost twenty years until the opportunity arises to steal the gold.
Additional Information:
Originally published in 2008, updated in 2019 with additional screen captures and storyline added by Phil Wilkinson

As an Amazon Associate, we earn from qualifying purchases.
Can you help:
If you have any information regarding this production, the locations or, even better, some comparison shots please contact us. Images submitted must be in Landscape orientation, as would be seen on the cinema screen, not Portrait.
We are aware that there are films on the site that were added when the criteria for the inclusion of locations was very different from today and, as a result, there may be scenes missing from some productions. Please do not forward additional screen captures to us but bring the detail to our attention, for we do, and are, 're-addressing' these older entries as time allows.
- Capture 1
- 05 May 2019
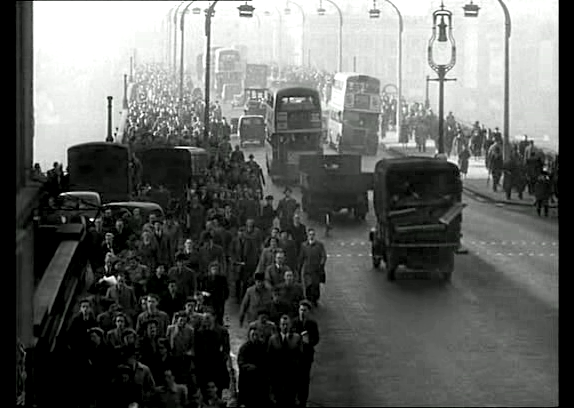
The scene is set by Henry Holland as he narrates “Most men who long to be rich know inwardly that they will never achieve their ambition. But I was in the unique position of having a fortune literally within my grasp.” Looking south across the “New” London Bridge full of commuters making their way into the City for work.
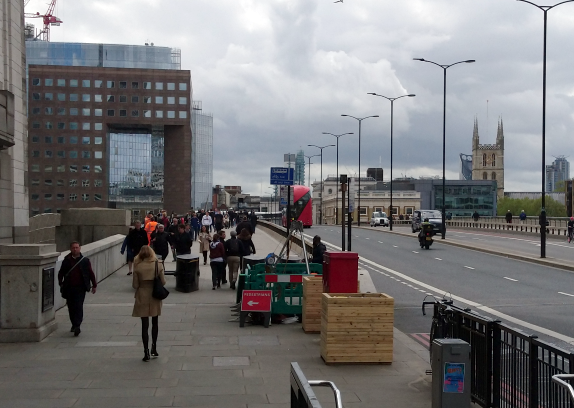
The 'new' new London Bridge. (PW)
- Capture 2
- 13 May 2019
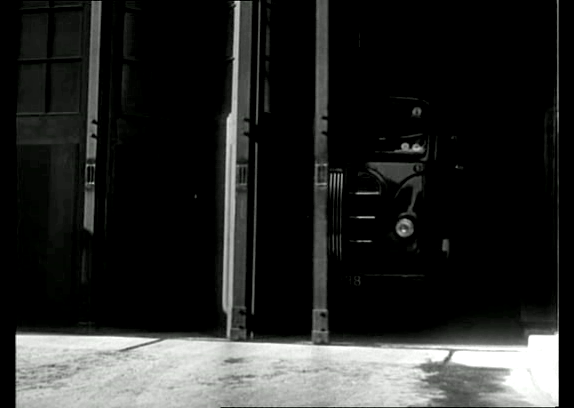
For it was Holland’s job to supervise the deliveries of bullion from the gold refinery to the bank. Dave W, justifiably pleased with himself has identified 73 to 83 Hatton Garden: Johnson Matthey & Co Ltd, bullion melters. Among other productions, Hatton Garden also appears in ‘King of Thieves’, ‘Robbery’, ‘Dateline Diamonds’, ‘The Primitives’, ‘The Secret Place’, ‘The Frightened Man’ and ‘A Fish Called Wanda’. (RL)
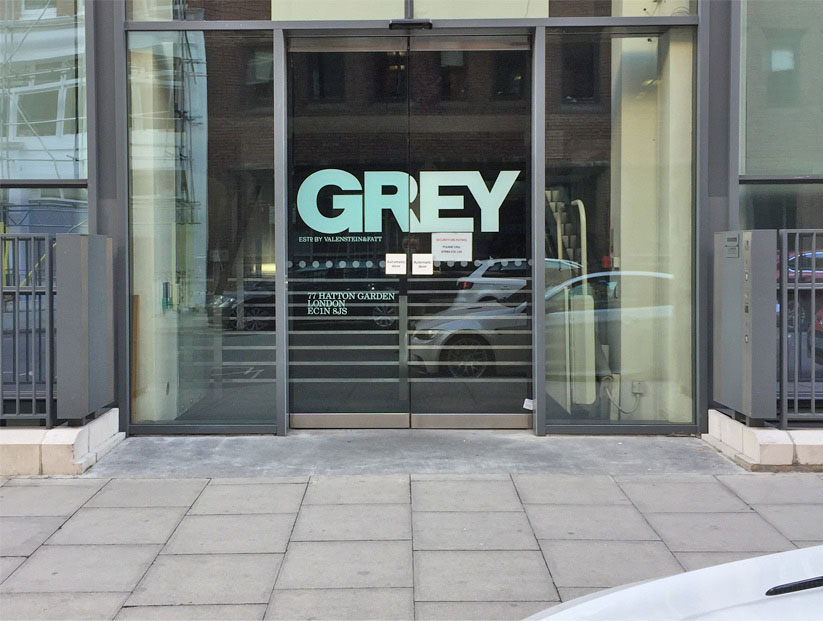
True to his word Dave provides a shot of the location as it is today and tells us that the building is now named as Johnson House thus preserving a historical connection. But are these new sliding doors wide enough to allow Holland's van to exit with ease? (RL)
- Capture 3
- 13 May 2019
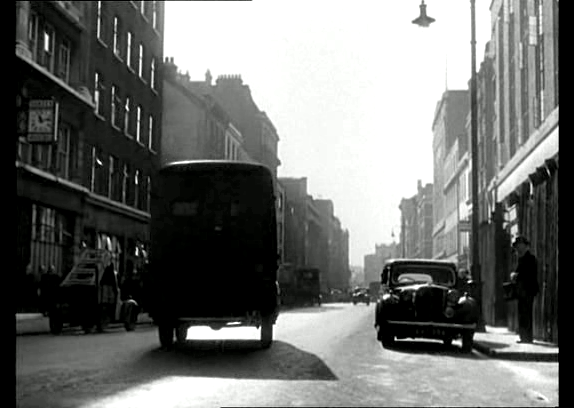
The unassuming clerk was well aware they everyone ridiculed him for the way he fussed and worried and that was precisely what he had striven for years to achieve. The clock to the left of the capture is for Vertex, watch manufacturer of 37 38 Hatton Garden EC1. (RL)
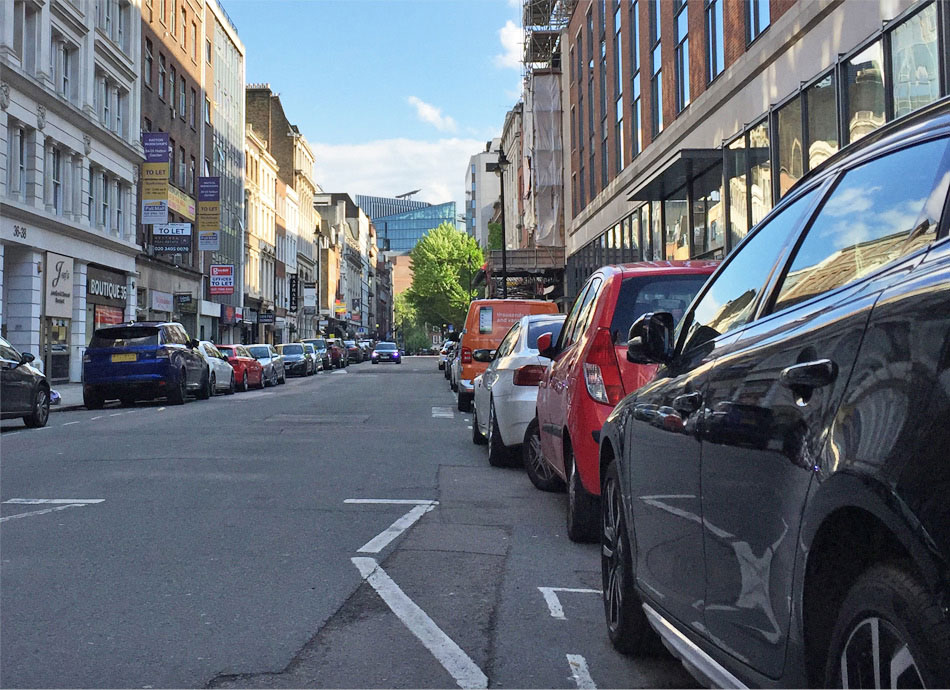
Dave reveals that portions of the street's roofline preserve the shape of 1951 even though time and the Vertex clock have moved on. (RL)
- Capture 4
- 05 May 2019
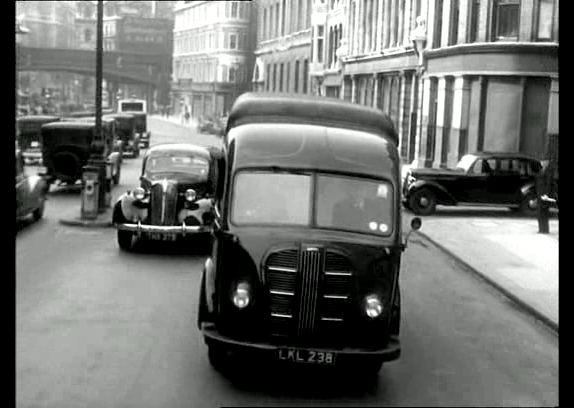
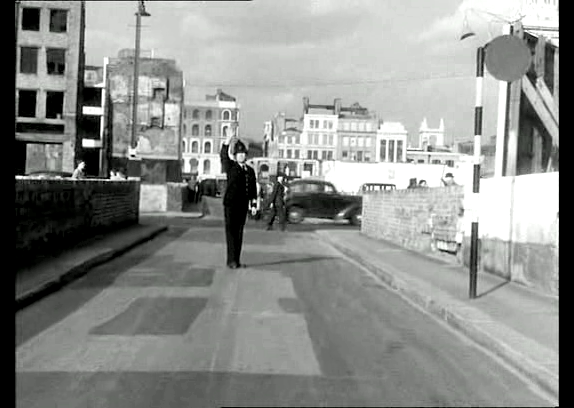
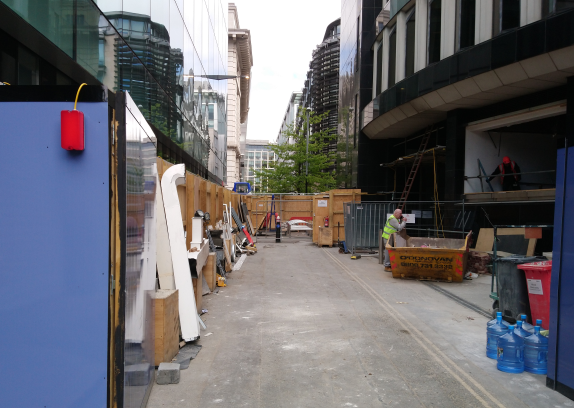
Through his window in the back door of the bullion van, Holland sees a black Chrysler following and presses the alarm. Queen Victoria Street in EC4 with the bridge carrying the railway between Blackfriars and Holborn Viaduct in the left distance.
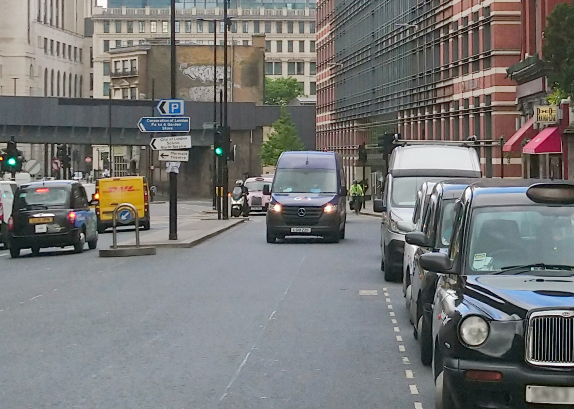
The Black Friar public house still stands in the distance. (PW)
- Capture 5
- 'Now' required
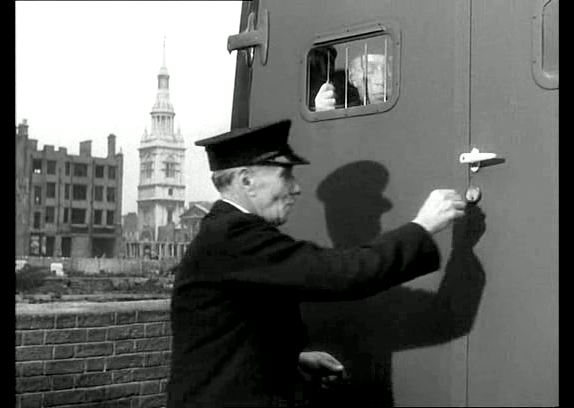
Repeating the routine that has been played out so many times, Henry Holland (Alec Guinness) waits as Wallis (Arthur Hambling) unlocks the door of the Austin K8 van. Roy Barnacle advises that this is Queen Victoria Street with the ruins of St. Mary-le-Bow church on Cheapside in the left distance.
- Capture 6
- 17 Mar 2012
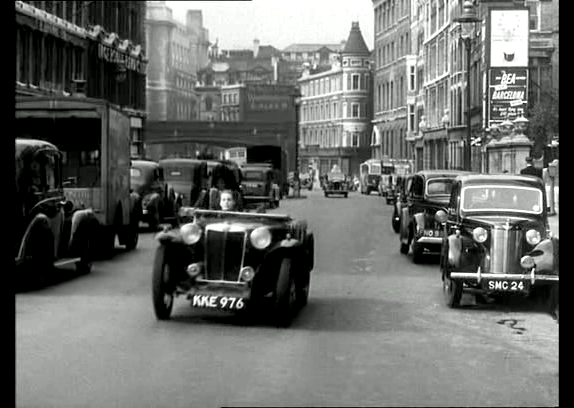
With the Chrysler no longer in sight, Holland suggests to Wallis that he check around the upcoming corner. Facing west on Queen Victoria Street.
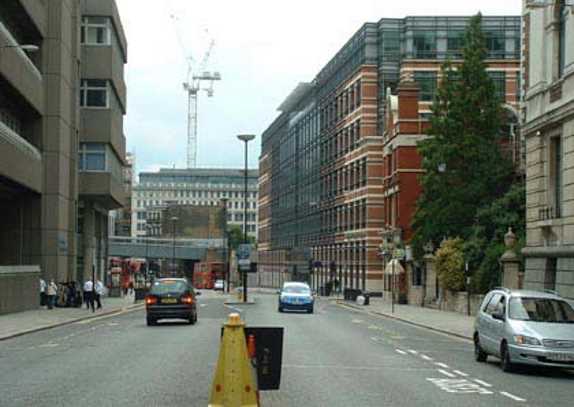
Paul Revis provides this view.
- Capture 7
- 05 May 2019
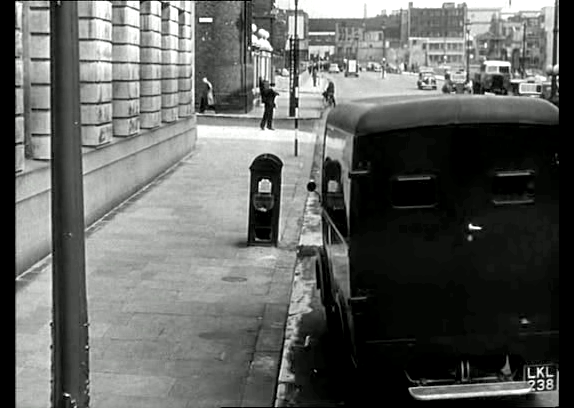
Once again, Wallis waves his Driver forward when no threat is apparent. Looking eastward on Queen Victoria Street with the corner of Godliman Street to the left beyond the Faraday Building.
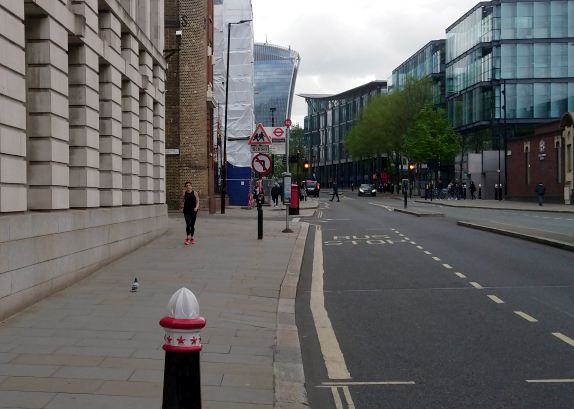
Looking towards the same corner. (PW)
- Capture 8
- 13 Jun 2011
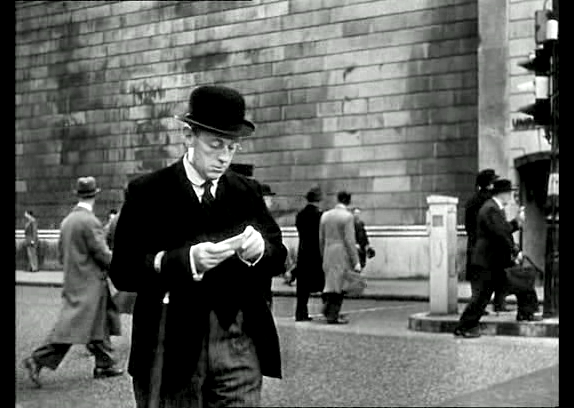
Holland was a potential millionaire, yet had to be satisfied with eight pounds fifteen shillings, less deductions, a weekly reminder that the years were passing and that his problem of finding a way to export stolen gold was still unsolved. The Bank of England at the corner of Prince’s Street and Threadneedle Street in EC2 provides the backdrop.
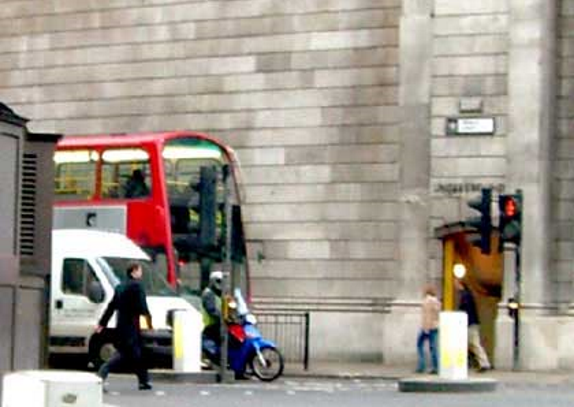
This comparison shot is from Marc Maitland.
- Capture 9
- 06 Sep 2008
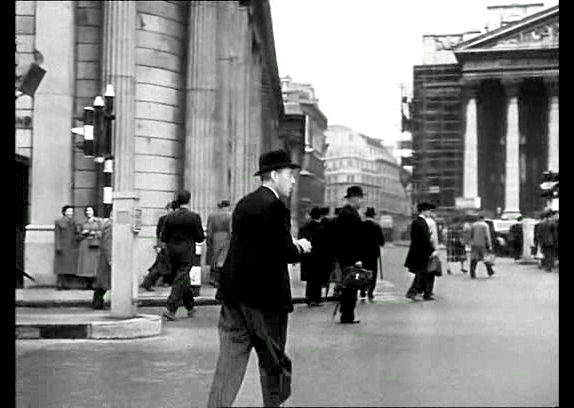
Having checked his pay packet, Holland joins the other bowler hatted commuters as they leave work. Looking north-west along Threadneedle Street with The Bank of England to the left and The Royal Exchange on the right. The junction can be seen in a number of productions including 'The Mackintosh Man', 'What's Good for the Goose', 'The Salvage Gang', 'Circus of Fear', The Green Man', 'The Passionate Friends', 1951's 'Scrooge', 'A Touch of Class', 'Wanted for Murder', 'Der Gorilla von Soho', '28 Days Later . . .', 'Two Gentlemen Sharing', 'Monsieur Ripois' and 'Mary Poppins Returns'.
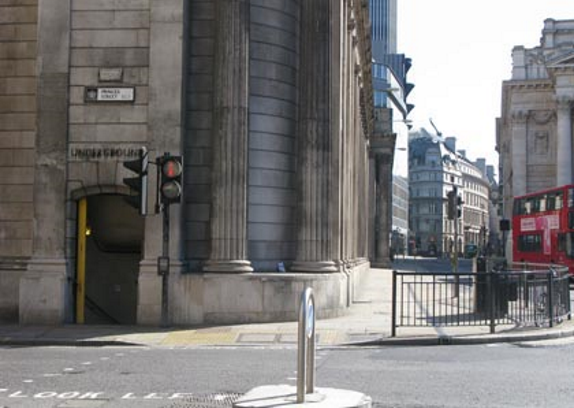
The corner of Prince's Street now. SJ.
- Capture 10
- 13 Jun 2011
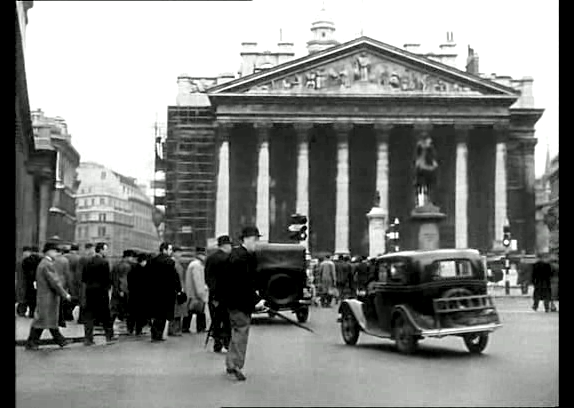
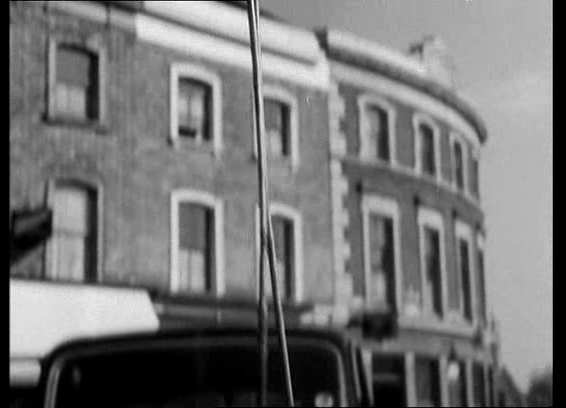
Holland crosses the road and makes his way to the station to travel home to Miss Evesham’s Balmoral Private Hotel in Lavender Hill. The Royal Exchange fills the background, flanked by Threadneedle Street and Cornhill.
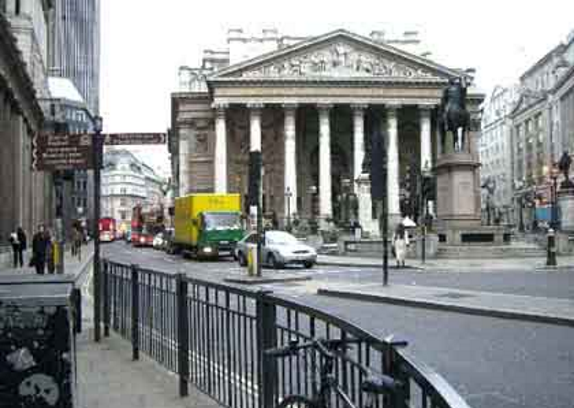
Marc Maitland visited the same spot.
- Capture 11
- 13 Jun 2011
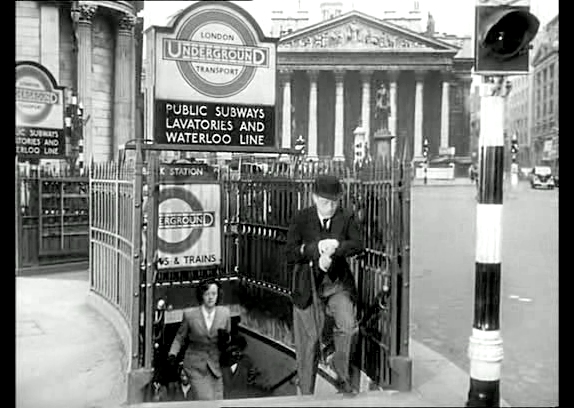
Returning to the City after assisting new tenant Alfred Pendlebury to move in to the Balmoral over the weekend, Holland makes his way to the back where he is horrified to find that he is to be promoted to the foreign exchange office. This is the entrance to Bank Underground station at the corner of Prince’s Street and Mansion House Street.
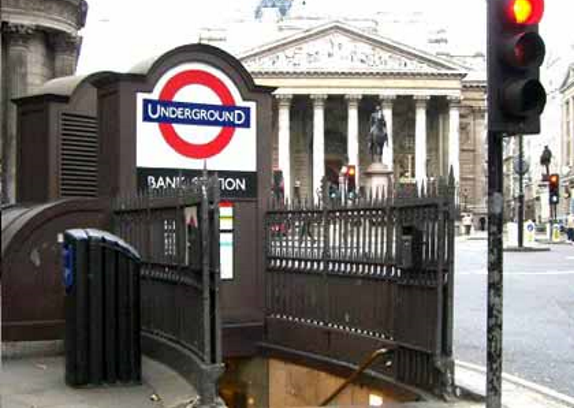
Again, Marc provides a view of the same location.
- Capture 12
- 01 Jan 2008
- 07 Jun 2025
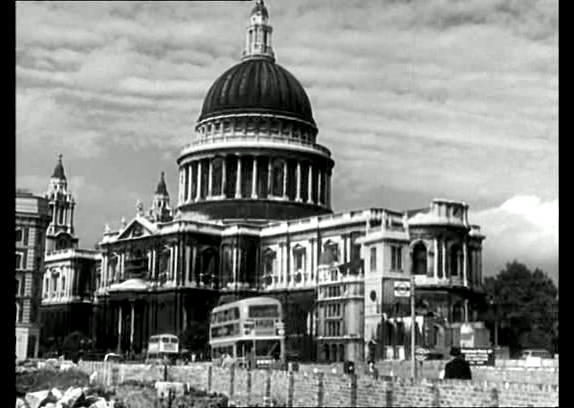
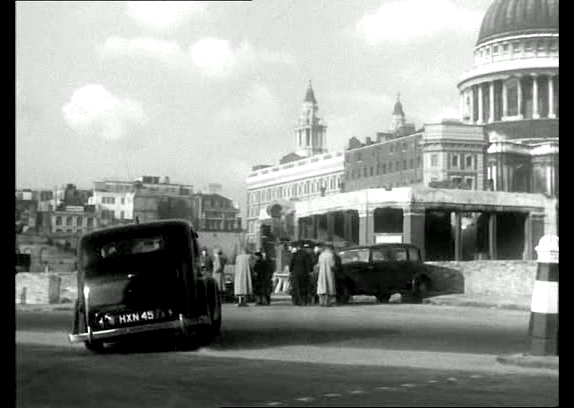
Having recruited Pendlebury and two crooks named Lackery and Shorty to assist with his plan, Holland makes his final bullion delivery. A war ravaged Cannon Street EC4 with the almost unscathed St. Paul’s Cathedral prominent.

St. Paul's Cathedral by Peter Banham.
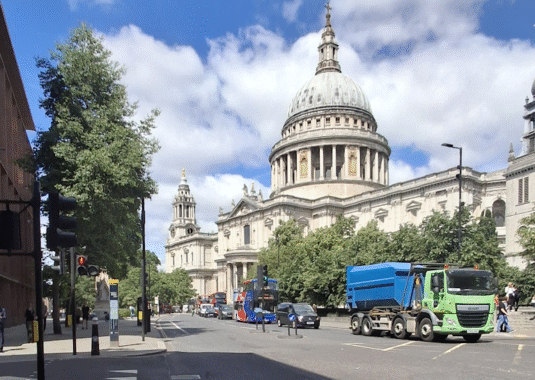
Taken from the best position available by Stephen David.
- Capture 13
- 05 May 2019
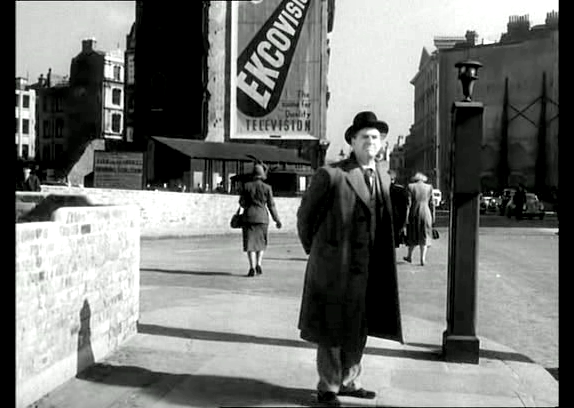
Alfred Pendlebury (Stanley Holloway) waits nervously at a corner for the van to approach. Facing east on Queen Victoria Street at the corner of Friday Street. A similar view, with the Police Call Post in colour, is seen in ‘Robbery’.
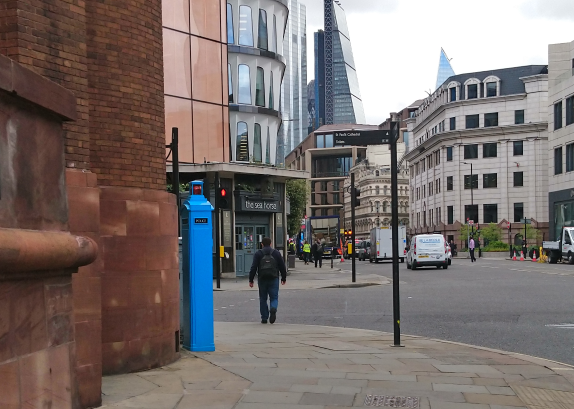
A Police Call Post still stands at the corner. (PW)
- Capture 14
- 01 Jan 2008
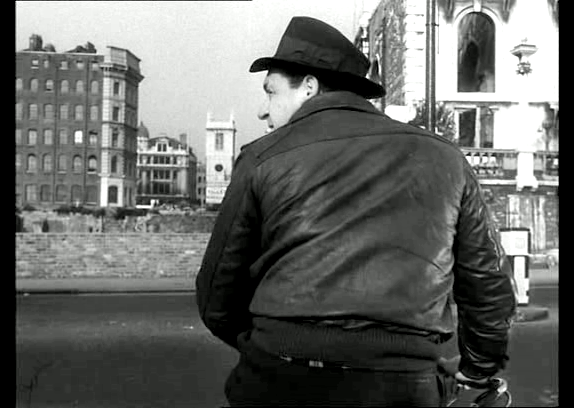
Nearby, Lackery Wood (Sid James) sits astride the bicycle he can hardly ride. Queen Victoria Street with buildings at the corner of Carter Lane and Old Change in the left background, the ruined St. Augustine’s church in the centre distance and the bomb damaged St. Nicholas Cole Abbey to the right.
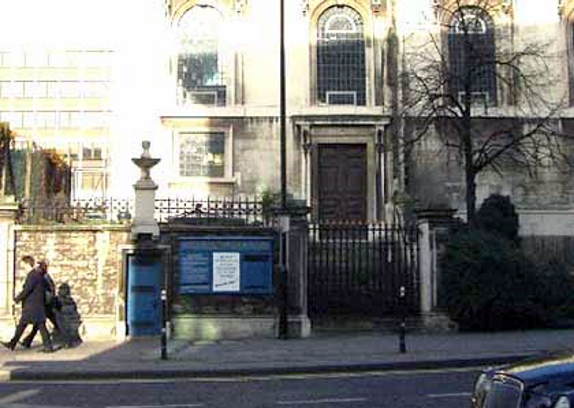
A more up to date view of St. Nicholas Cole Abbey.
- Capture 15
- 'Now' required
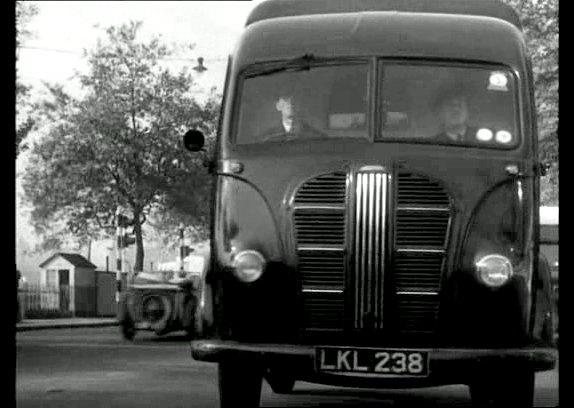
Holland’s last journey continues towards the City. Lamp posts at the start of this sequence suggest Victoria Embankment in SW1, possibly approaching Hungerford Bridge.
- Capture 16
- 05 May 2019
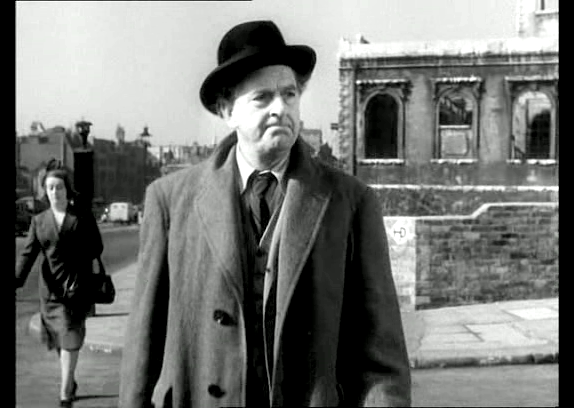
Losing patience, the seaside knickknack manufacturer wanders away from the corner. The corner of Queen Victoria Street and Friday Street with St. Nicholas Cole Abbey in the right background.
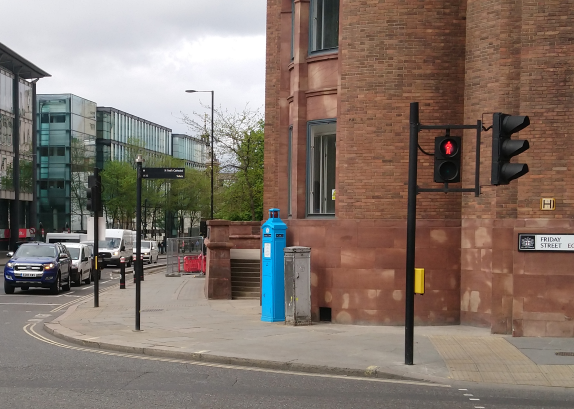
The corner of Friday Street with added buildings. (PW)
- Capture 17
- 05 May 2019
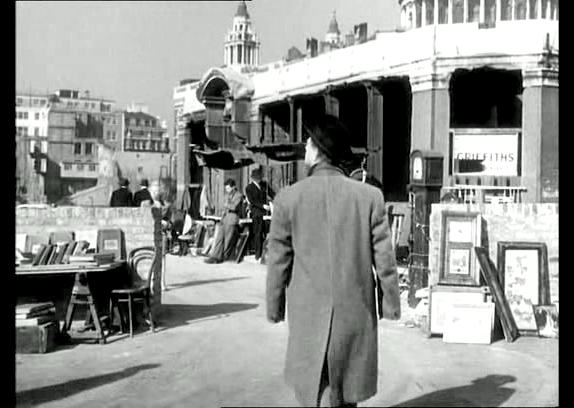
A group of stalls selling furniture and artwork distract Pendlebury. This is the corner of Knightrider Street and Friday Street with St. Paul’s Cathedral visible behind the public house ruins to the right. Dave W tells us that the damaged building was the White Horse public house at 32 Friday Street. (RL)
The shape of the pub is almost remembered in the current building's footprint. (PW)
- Capture 18
- 05 May 2019
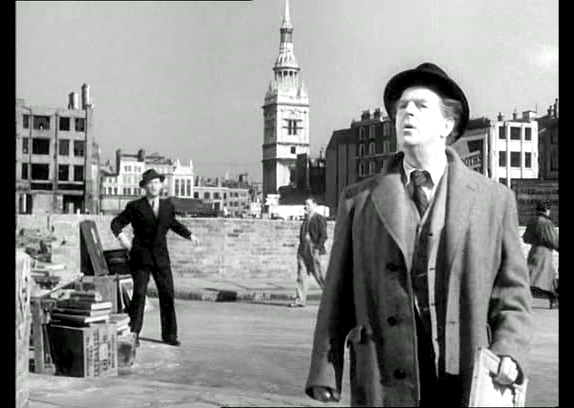
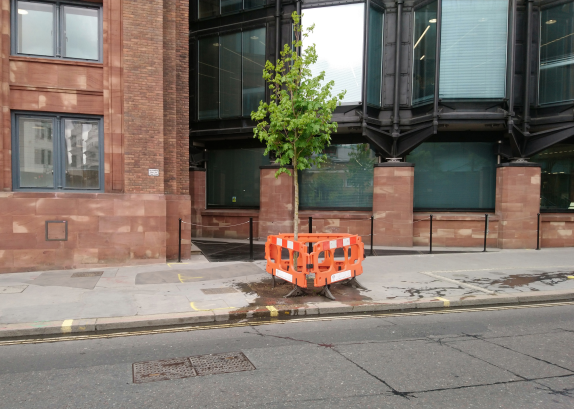
Clayton (Sydney Tafler) calls after Pendlebury as he walks away from his stall with a painting that he was admiring. Facing north at the corner of Knightrider Street and Friday Street with St. Mary-le-Bow of Cockney defining Bow Bells fame in the centre distance.
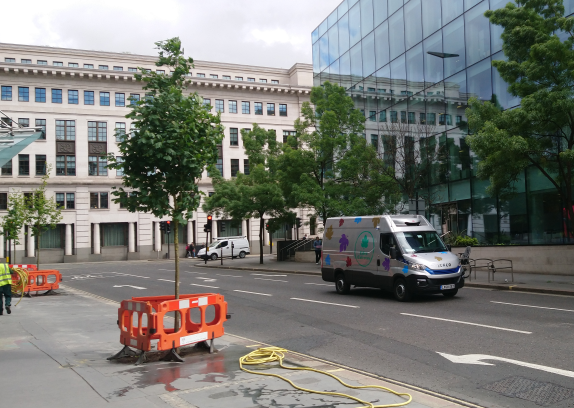
The church now stands behind modern buildings and it looks like even the present view will be obscured by trees in the not too distant future. (PW)
- Capture 19
- 05 May 2019
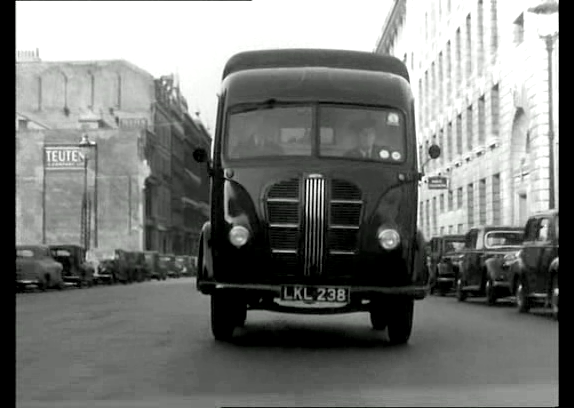
While Pendlebury is accused of stealing an early work by Rochet, the bullion van draws nearer to the site of the planned hijack. Looking west on Queen Victoria Street with the Faraday Building to the right. The Faraday Building also appears in 'Five Days and 'Profile'.
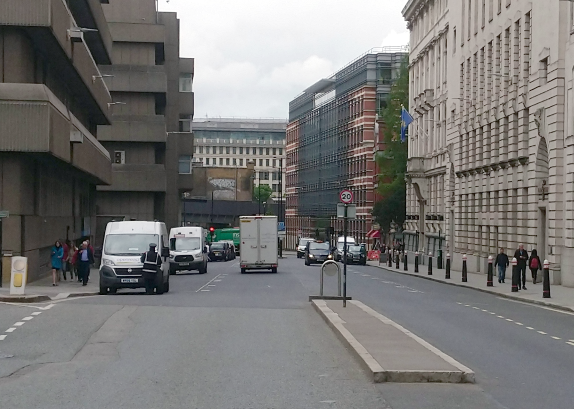
Facing the same way, from the other side of the road. (PW)
- Capture 20
- 01 Jan 2008
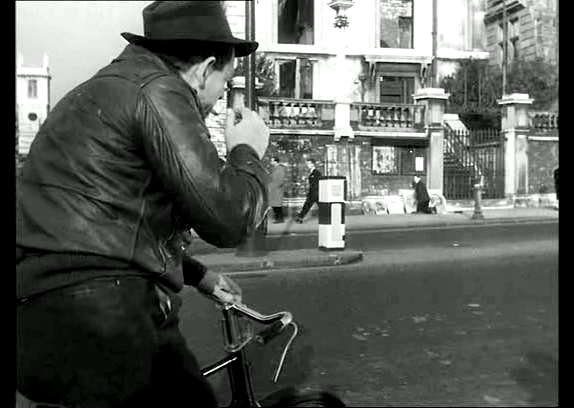
Lackery takes a last draw on his cigarette as, across the street, Shorty Fisher (Alfie Bass) spots the van approaching. Queen Victoria Street with St. Nicholas Cole Abbey on the far side of the roadway.
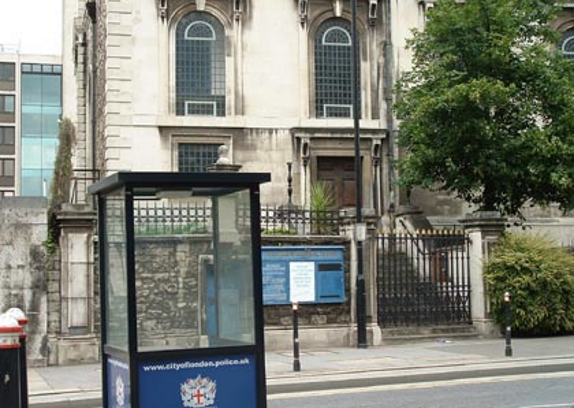
From a slightly different angle.
- Capture 21
- 05 May 2019
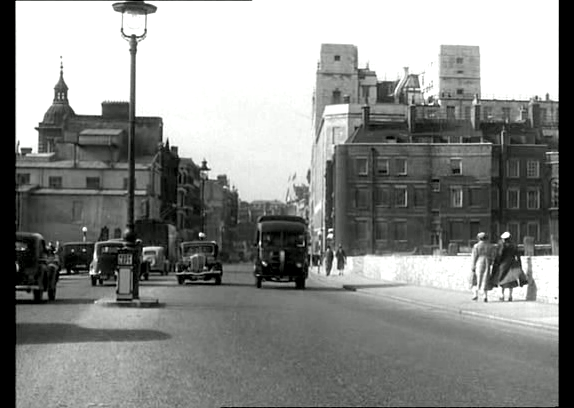
A car overtakes the van and Holland presses the alarm. Facing the junction of Queen Victoria Street and Peter’s Hill, now Sermon Lane, with the domed tower of St. Benet’s church to the top left anf the College of Arms on the right. This section of street appears in ‘On Her Majesty's Secret Service’, ‘Crossplot’ and ‘The Jokers’.
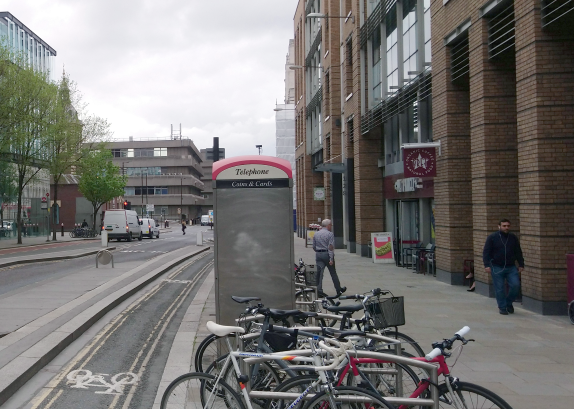
The dome of St. Benet’s church is just about visible behind the trees to the top left. (PW)
- Capture 22
- 07 Jun 2025
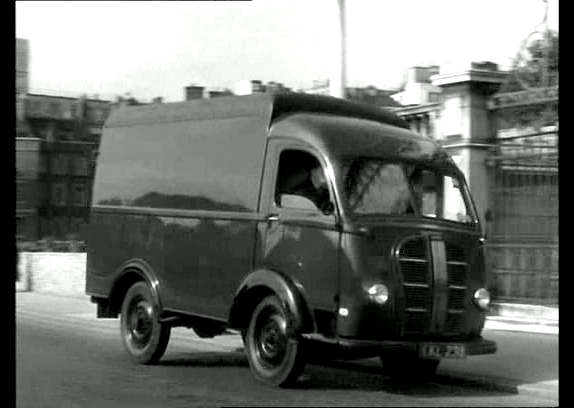
The Driver brings the Austin to a halt near Shorty. Outside St. Nicholas Cole Abbey on Queen Victoria Street EC4.
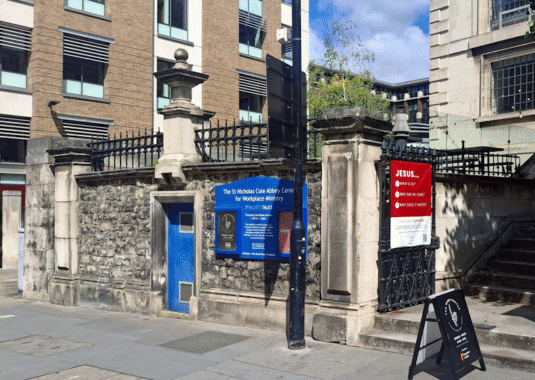
Stephen David returned to the scene.
- Capture 23
- 05 May 2019
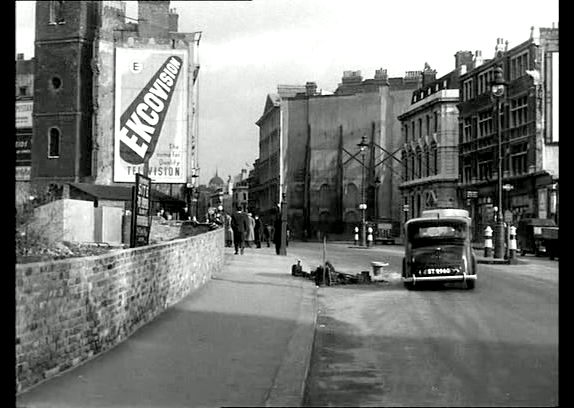
Wallis comments that “He's picked a wrong 'un this time” as the passing vehicle is revealed to be a Police car. Looking east towards the junction of Queen Victoria Street and Friday Street.
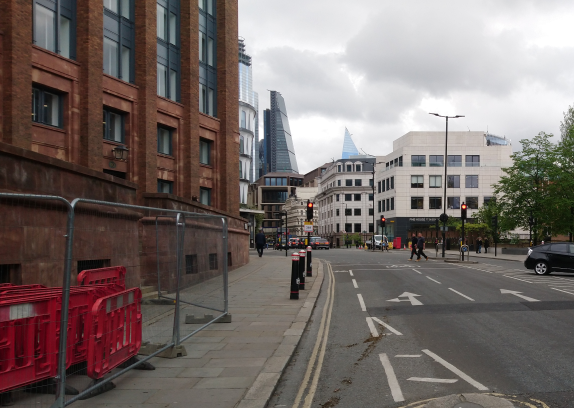
The same junction. (PW)
- Capture 24
- 05 May 2019
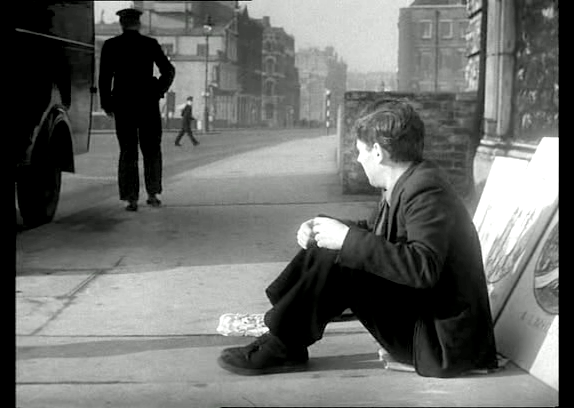
Shorty watches Wallis climb from the cab and walk to the rear of the van. Facing west on Queen Victoria Street.
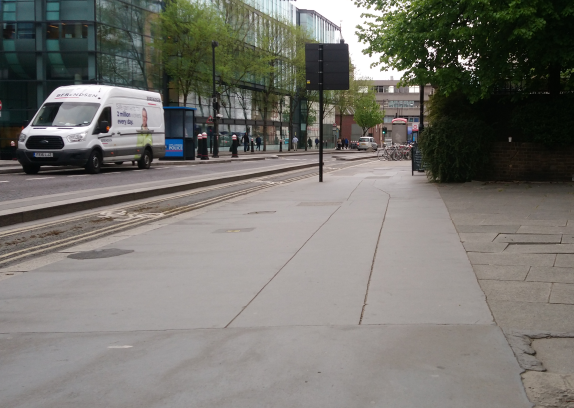
From a similar position. (PW)
- Capture 25
- 05 May 2019
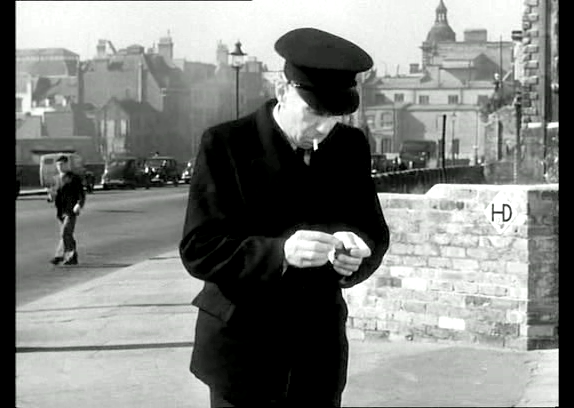
Following Holland’s usual request, Wallis lights a cigarette as he strolls to the next corner. The corner of Queen Victoria Street and Friday Street with St. Benet’s church tower to the top right.
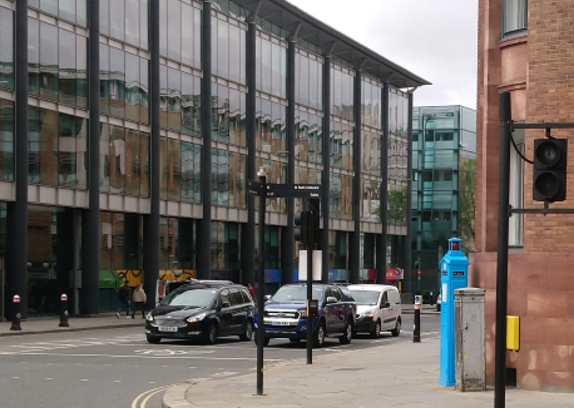
Modern buildings line Queen Victoria Street now. (PW)
- Capture 26
- 05 May 2019
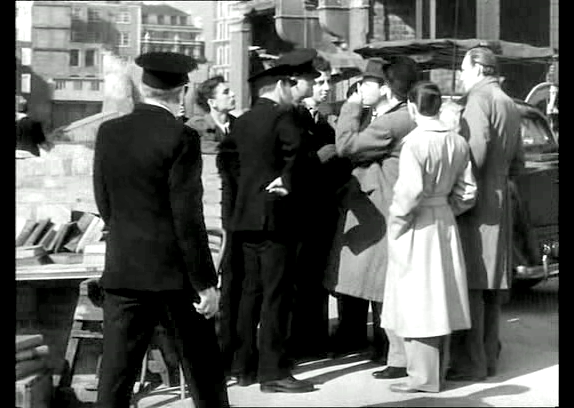
Pulling up near to Clayton’s stall, the Policemen begin to question Pendlebury about taking the picture. The corner of Knightrider Street and Friday Street
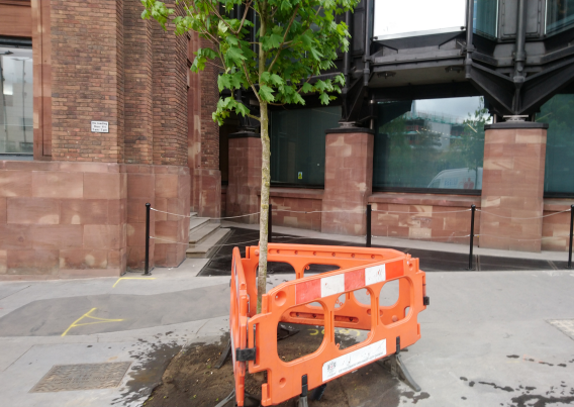
Is the young greenery being planted to mask the brown stone and brickwork one day? (PW)
- Capture 27
- 05 May 2019
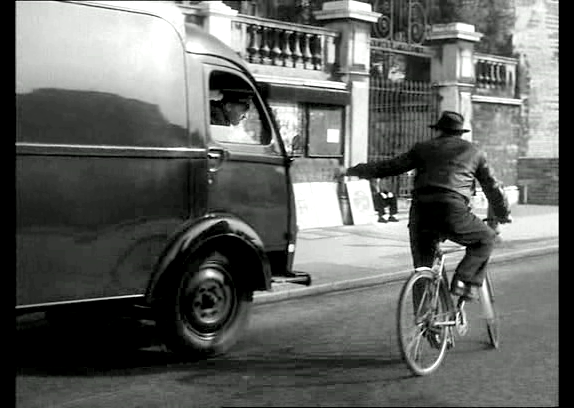
Riding unsteadily past the van, Lackery tells the Driver (Joe Clarke) that he has a flat tyre. Queen Victoria Street with the gates of St. Nicholas Cole Abbey in the background.
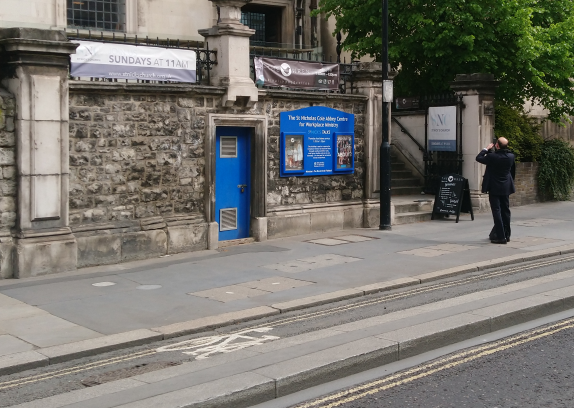
Someone else taking an interest in the reconstructed church. (PW)
- Capture 28
- 05 May 2019
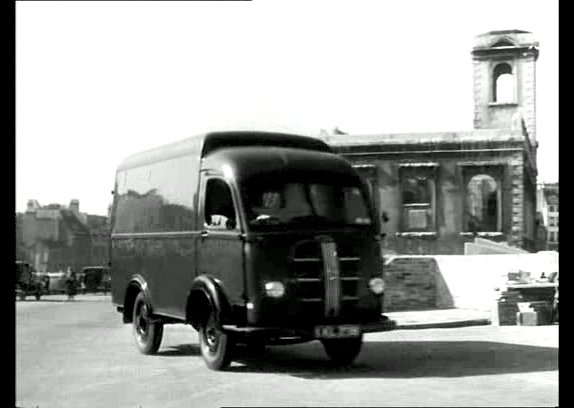
Climbing into the cab whilst the Driver checks his wheels, Shorty drives the van away with Holland shouting for help through the back window. The junction of Queen Victoria Street, Knightrider Street and Friday Street with the ruins of St. Nicholas Cole Abbey in the right background.
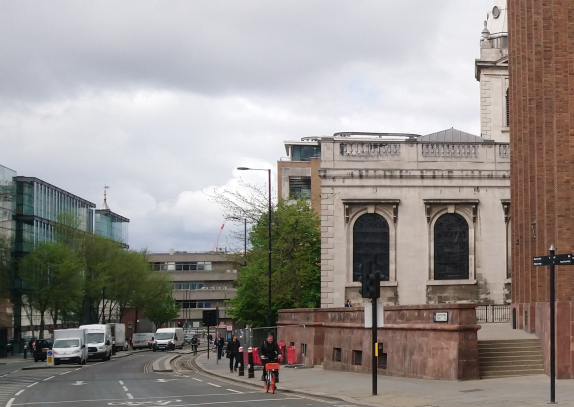
Taken from the middle of the quiet City junction. (PW)
- Capture 29
- 05 May 2019
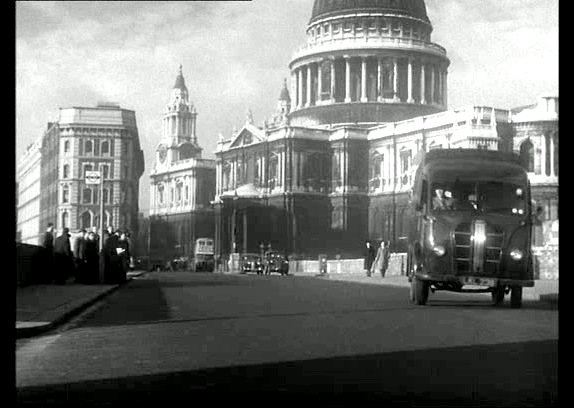
Carrying one million pounds in gold bullion, the maroon van speeds away. Cannon Street with the junction of Carter Lane and St. Paul’s Churchyard in the left background. The location is also seen in 'The Hostage', 'Das Verrätertor', 'The League of Gentlemen', 'Kaleidoscope', 'Edward, My Son', 'Tiger in the Smoke' and 'The Fan'.
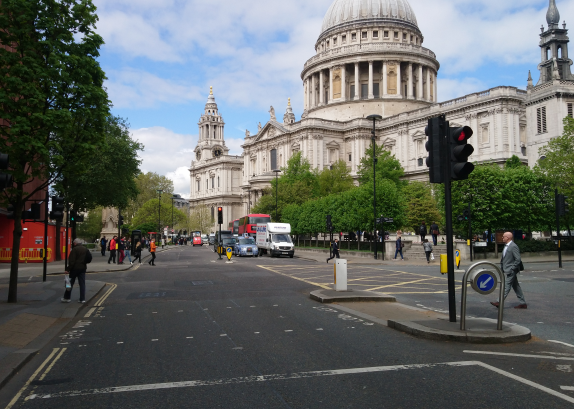
A more colourful view of the Cathedral. (PW)
- Capture 30
- 05 May 2019
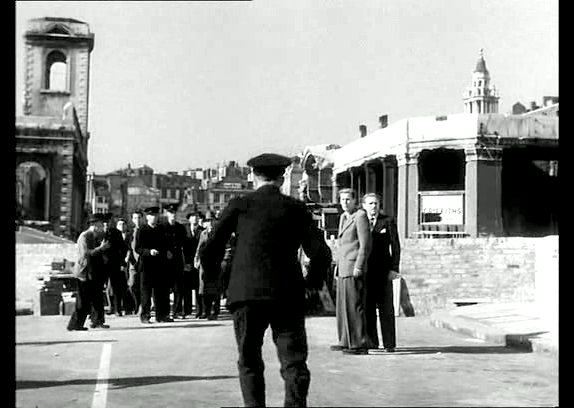
The van Driver runs to find his mate Wallis and comes across the Police speaking with Pendlebury and tells them that the bullion has been stolen. Looking west along the almost obliterated Knightrider Street with St. Nicholas Cole Abbey on the left and the southern end of Friday Street to the right. Dave W tells us that the damaged building was the White Horse public house at 32 Friday Street. (RL)
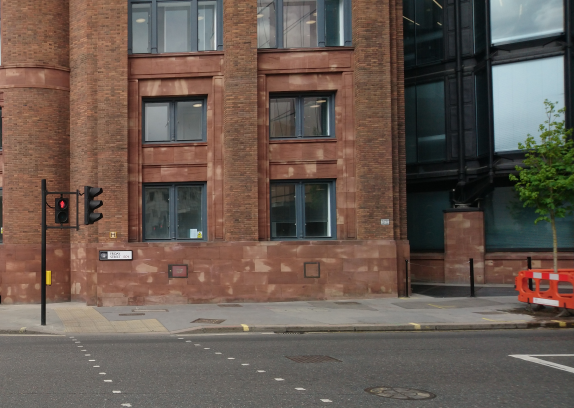
The former east end of Knightrider Street. (PW)
- Capture 31
- 05 May 2019
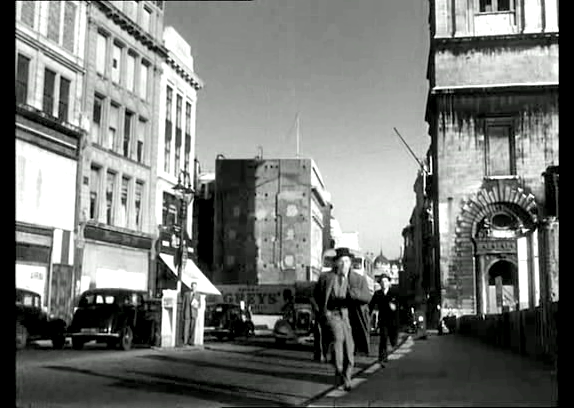
Seizing the opportunity, Pendlebury makes a run for it and Clayton sets off in pursuit. Facing east at the corner of Cheapside and Bow Churchyard with St. Mary-le-Bow church on the right. Location identified by Edward Shum.
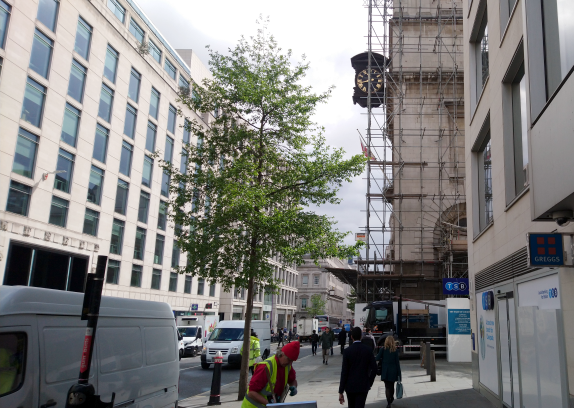
A clock makes a welcome addition to the church tower but the scaffolding mars the view. (PW)
- Capture 32
- 10 Apr 2016
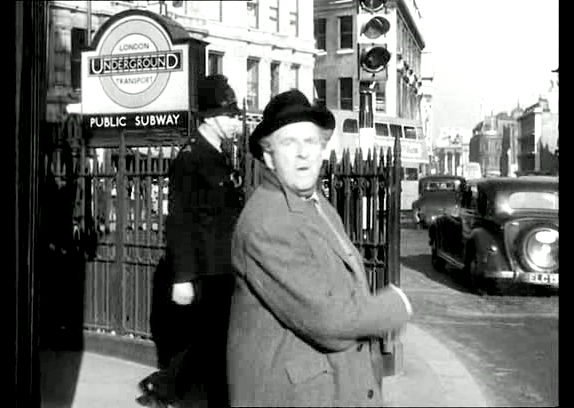
Looking around as he runs, Pendlebury bumps into a Policeman who apprehends him. The entrance to Bank Underground station at the corner of Poultry and Queen Victoria Street with Mansion House Street ahead to the right and the Royal Exchange distance.
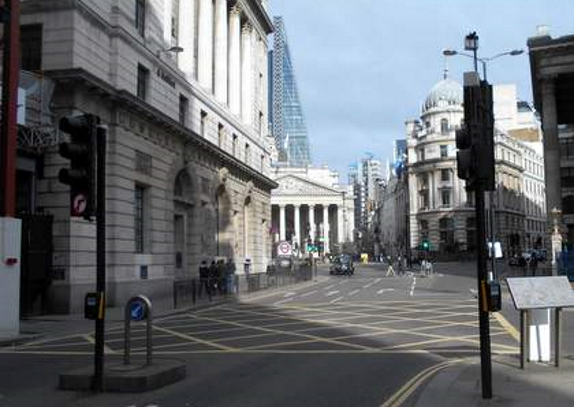
Peter couldn't get the right angle as No. 1 Poultry is now in the way. The station entrance in the screen capture has since been demolished as was discovered by RL in a recent shot of the same location.
- Capture 33
- 05 May 2019
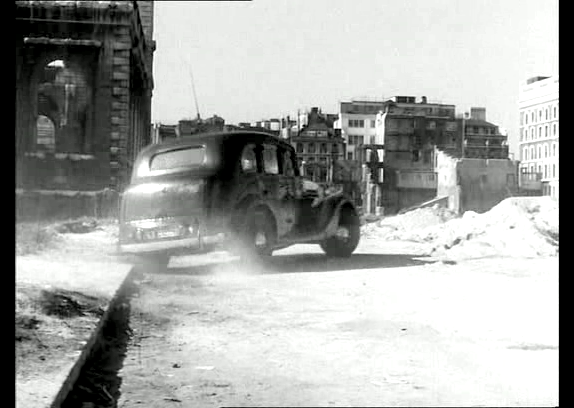
The Officers return to their car and radio headquarters about the robbery. Looking toward the junction of Knightrider Street and Distaff Lane with the ruins of St. Nicholas Cole Abbey to the left. Distaff Lane is seen in ‘Pool of London’.
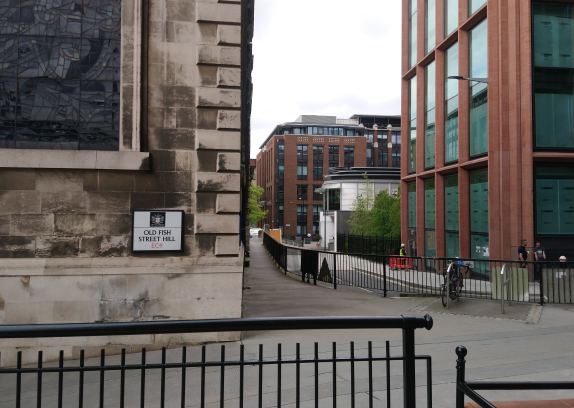
The best shot possible due to the large building behind me but I have to question the 'oldness' of Fish Street Hill . . . . it certainly didn't exist in the 50s.
- Capture 34
- 05 May 2019
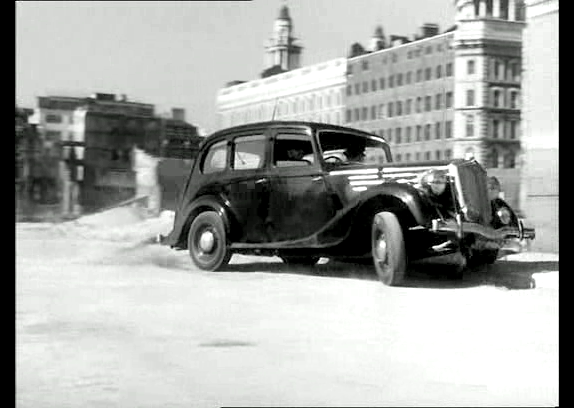
With their Wolseley turned around, the Policemen set off after the bullion van. Knightrider Street with buildings on Carter Lane in the right background.
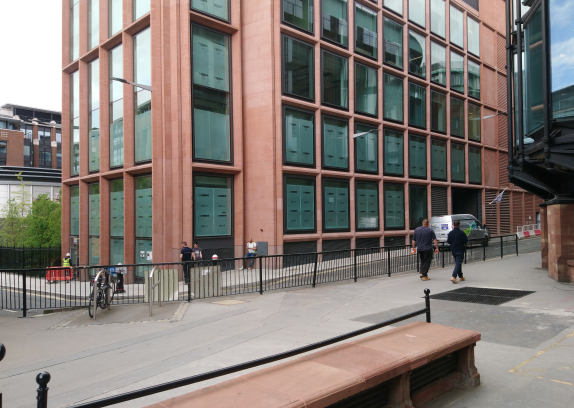
The same corner . . . . and more buildings to come by the look of the waste ground to the extreme left. (PW)
- Capture 35
- 'Now' required
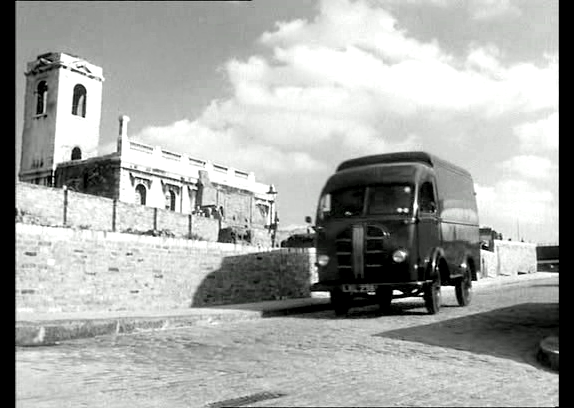
Shorty speeds along war damaged streets to where Pendlebury’s company van is hidden. Lambeth Hill with St. Nicholas Cole Abbey in the left background.
- Capture 36
- 05 May 2019
Another Police car arrives on the scene before Officers disperse to join the search for the thieves. The junction of Queen Victoria Street, Knightrider Street and Friday Street with St. Paul’s Cathedral in the right distance.
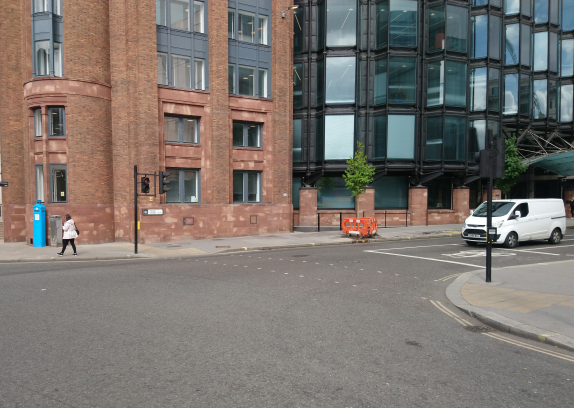
A less busy scene. (PW)
- Capture 37
- 05 May 2019
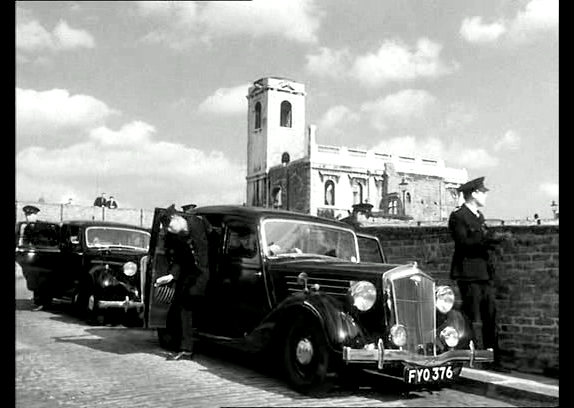
Getting out of their vehicles, Policemen scan the horizon. Lambeth Hill ran between Upper Thames Street and Queen Victoria Street. Peter Fischer recognised St. Nicholas Cole Abbey and Paul Mannas confirms, adding that the original spire was knocked off during the war.
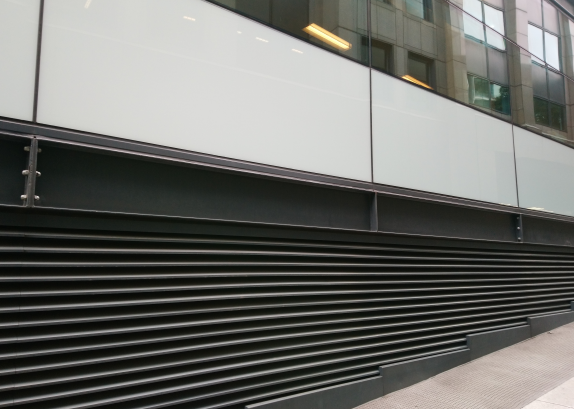
At a lower level, this is Booth Lane, the dead end that serves Millennium Bridge House. (PW)
- Capture 38
- 05 May 2019
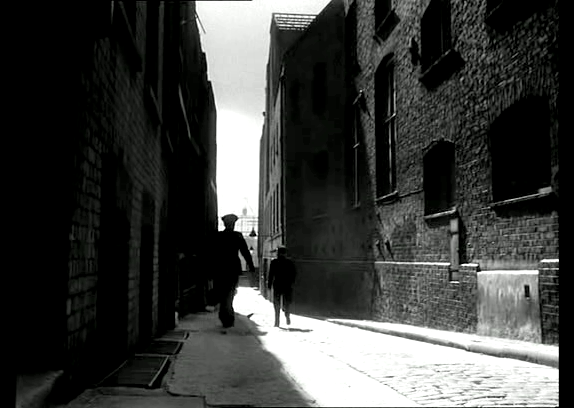
While Shorty, Lackery and Holland transfer the bullion into Pendlebury’s van in a riverside warehouse, Inspector Talbot (Christopher Hewett) and a Constable begin their search nearby. Looking south along Trig Lane EC4 towards the River Thames.
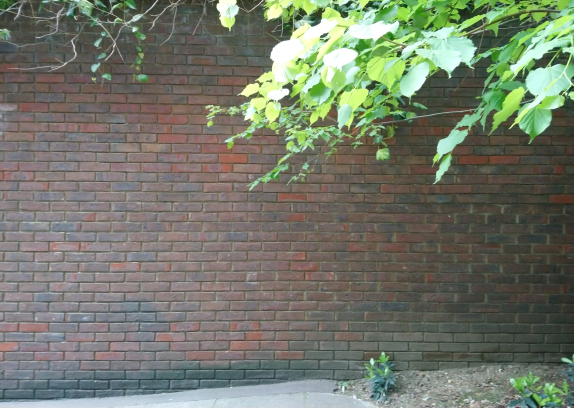
Not much to look at but this is the best view possible I'm afraid. Looking south at the end of Booth Lane, beneath Millennium Bridge House. (PW)
- Capture 39
- 05 May 2019
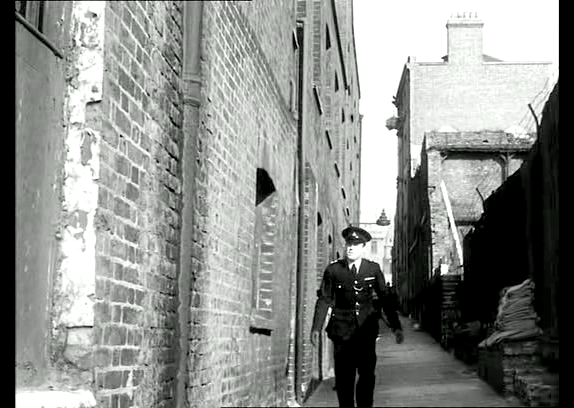
The Inspector checks derelict properties as Lackery and Shorty drive away with the gold. Facing north along Trig Lane towards Upper Thames Street. The passage can also be seen in 'Escape Route'.
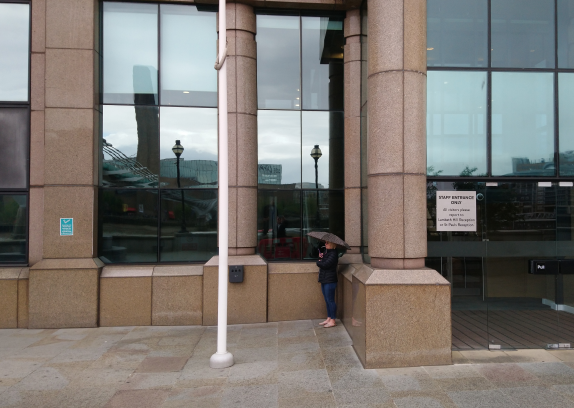
Facing Millennium Bridge House, the building that now stands in the space that Trig Lane and Castle Yard once occupied. (PW)
- Capture 40
- 'Now' required
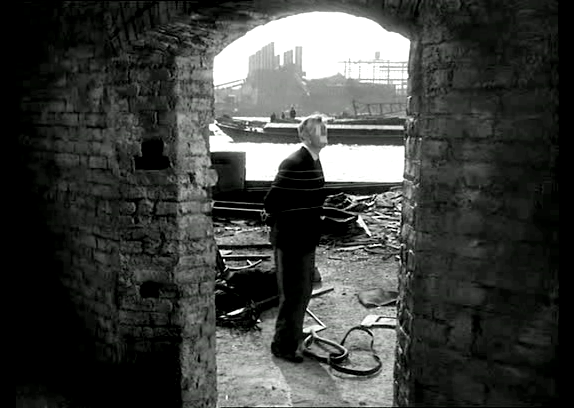
Tied up with his eyes taped closed by Lackery, Holland blindly moves nearer to the river from the warehouse. Looking out onto waste ground at the southern end of Castle Yard Lane with the chimneys of Bankside Power Station across the Thames.
- Capture 41
- 'Now' required
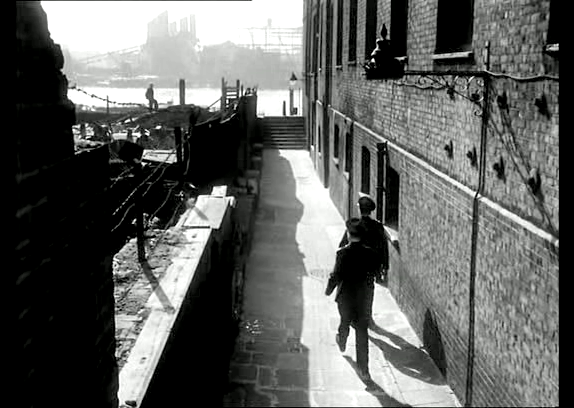
The Officers catch sight of Holland as he emerges onto waste ground. Looking along Trig Lane towards Trig Lane Stairs. Richard Hills advises that across the river, the reconstruction of Bankside Power Station, now the Tate Modern, is under way.
- Capture 42
- 'Now' required
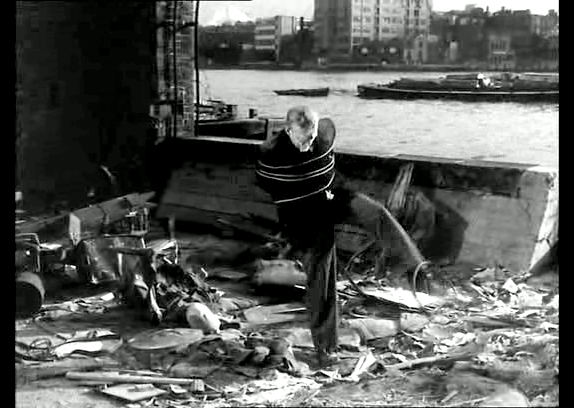
Hopping about outside the warehouse, the helpless clerk becomes tangled in debris as he struggles to move about. The southern end of Castle Yard Lane with the works and warehouses on Bankside visible across the King’s Reach of the Thames.
- Capture 43
- 05 May 2019
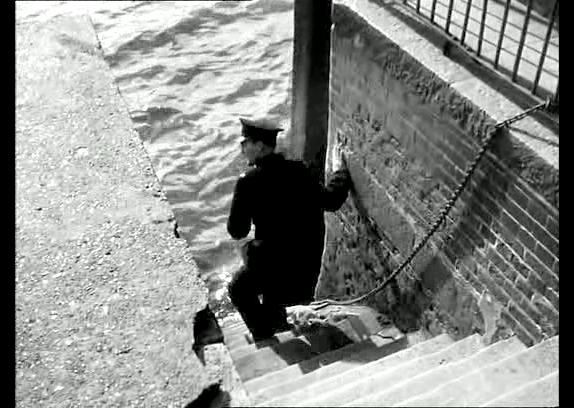
The Constable looks for a way to get closer to Holland. Trig Lane Stairs in EC4.
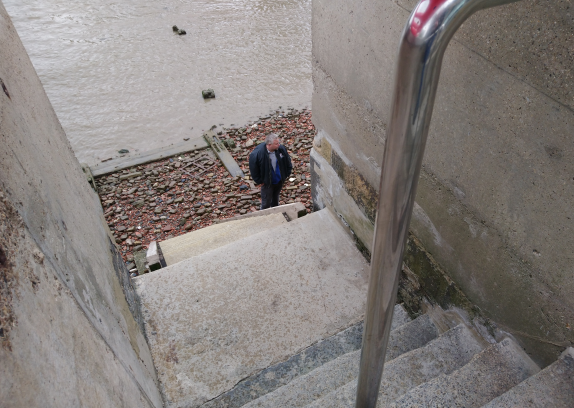
With thanks to Dave (there he is) for arranging access whilst restoration work was being carried out. (PW)
- Capture 44
- 'Now' required
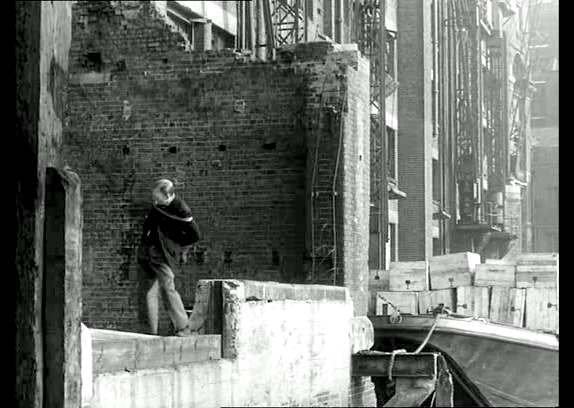
Feigning a fight as he attempts to free himself from his bonds, Holland gets closer to the river. Looking along the walls and doors of Sunlight Wharf with Brook’s Wharf on the extreme right.
- Capture 45
- 05 May 2019
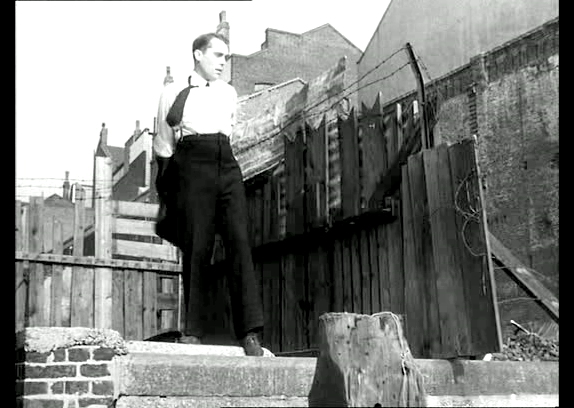
When Holland falls from the quayside, the Policemen take off their jackets before diving in to save him. The southern end of Castle Yard Lane on the north bank of the Thames.
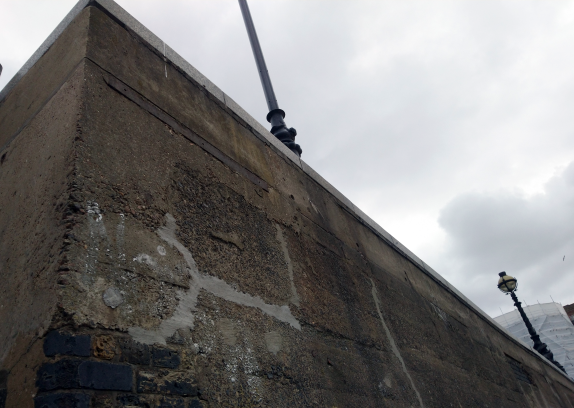
Taken from Trig Stairs and showing that the quays have all been raised. (PW)
- Capture 46
- 05 May 2019
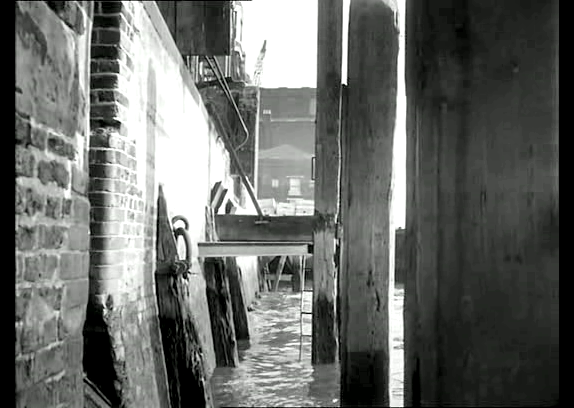
Holland flounders in the murky water. Looking towards Brook’s Wharf. The area has been redeveloped with Paul’s Walk running where warehouses once stood.
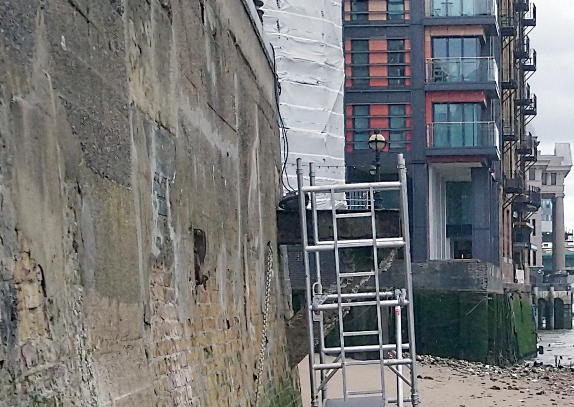
The steel work is still in place. Again, with thanks to Dave of Priest Stonemasons for helping with access. (PW)
- Capture 47
- 13 Jun 2011
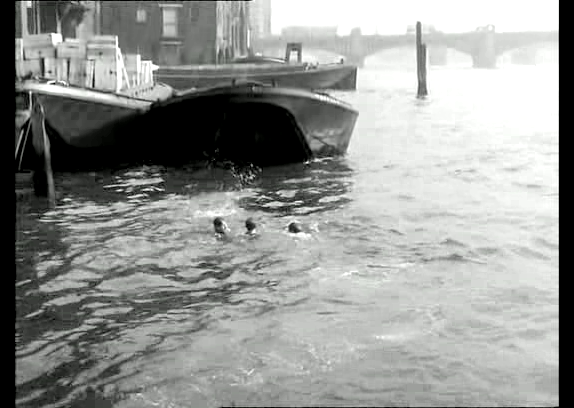
The Officers manage to save Holland from the Thames and take him to the same Police Station where Pendlebury is being detained. Richard Hills identifies Southwark Bridge crossing the Thames in the distance.
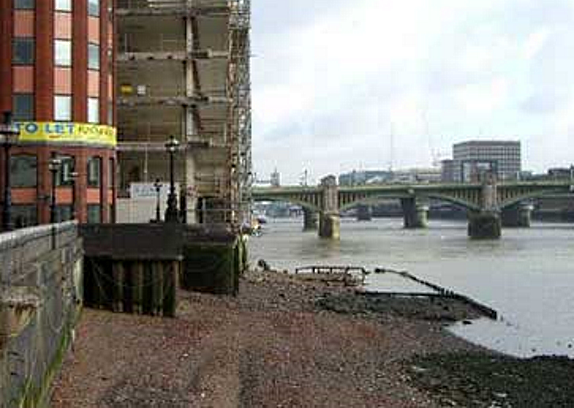
Marc Maitland captures the riverside scene now.
- Capture 48
- 'Now' required
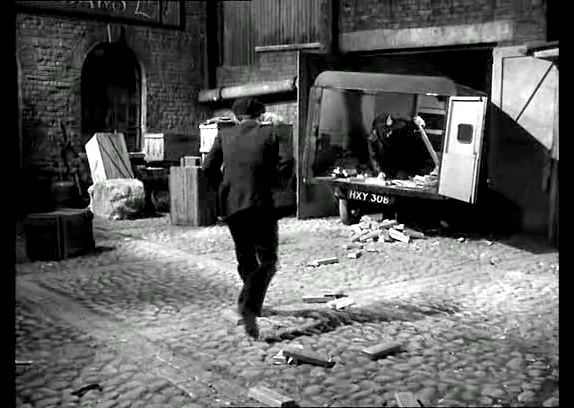
Crashing the van as they arrive back at Pendlebury’s foundry, Shorty and Lackey carry the gold into the building. A studio set included for completeness.
- Capture 49
- 'Now' required
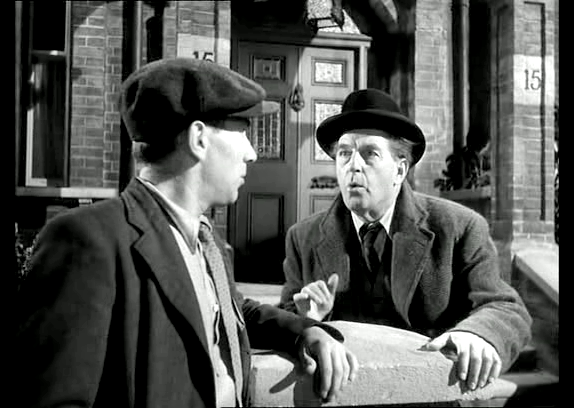
Pendlebury and Shorty arrive at the Balmoral Private Hotel where Holland has been brought back by the Police. Another set, just to show the fictional lodgings in Lavender Hill.
- Capture 50
- 05 May 2019
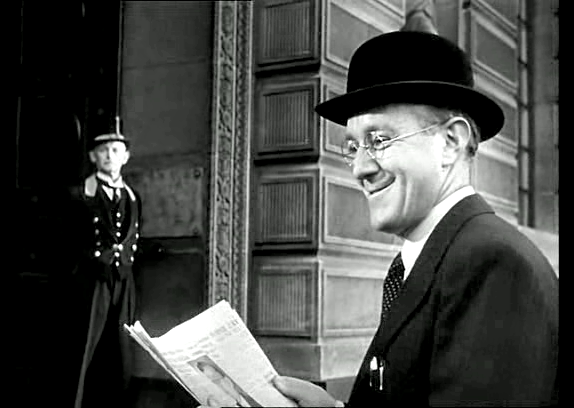
Declared to be a hero after attempting to fend off the robbers, Holland returns to the bank where he works. Philip Hughes identifies this as the Mansion House Street entrance of the National Provincial Bank at at 1 Princes Street in London EC2.
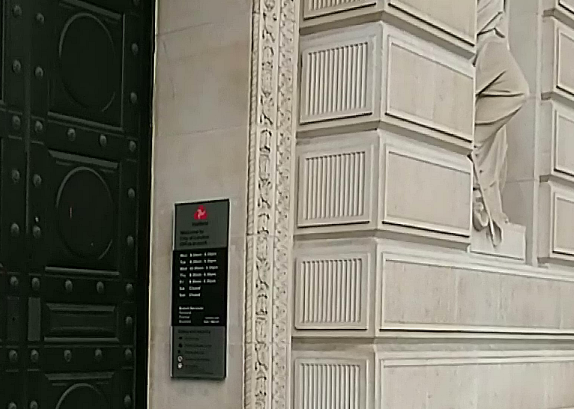
A modern information board adorns the same stonework. (PW)
- Capture 51
- 05 May 2019
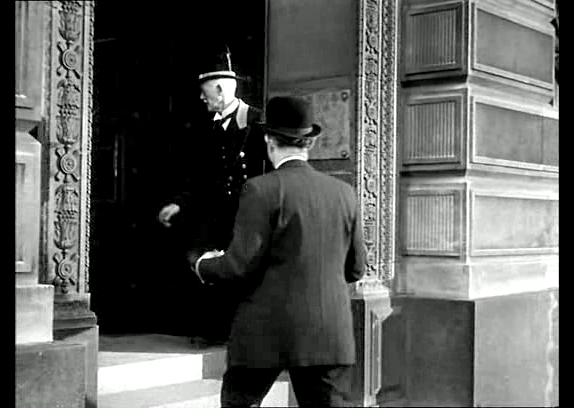
The Porter holds the door open and Holland enters to be taken to the Chairman and the Board of Directors. Outside the National Provincial Bank on Mansion House Street recognised by Philip Hughes.
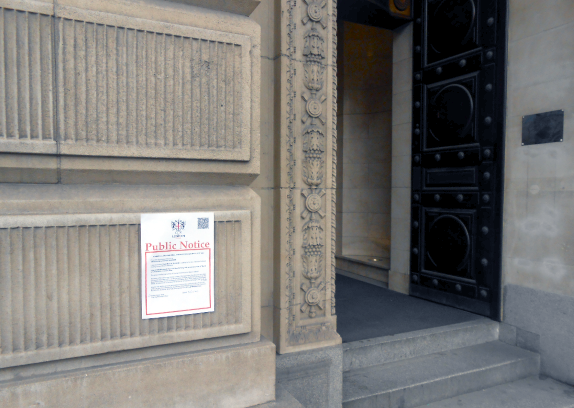
Philip also provides this comparison showing the detail around the bank's door. adding that this is the branch where he began his working career in 1974.
- Capture 52
- 07 May 2019
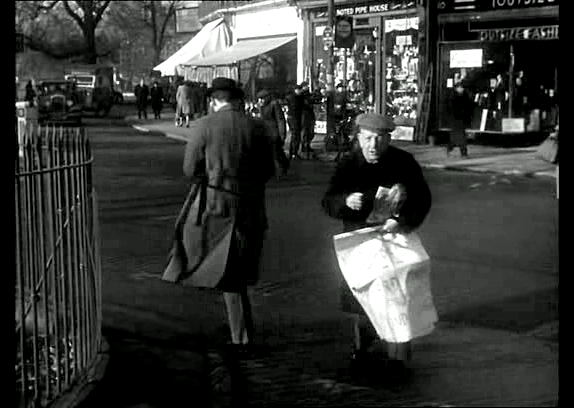
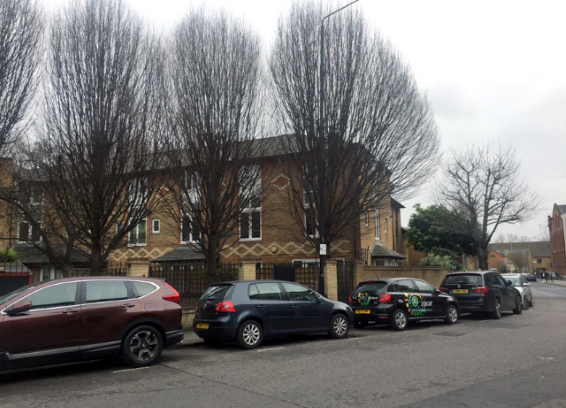
Newspapers carry headlines of Holland’s deeds and ask “Where are the Thieves?”. Dave W places this as The Pavement, London SW4 with Clapham Common Station behind the camera. (RL)
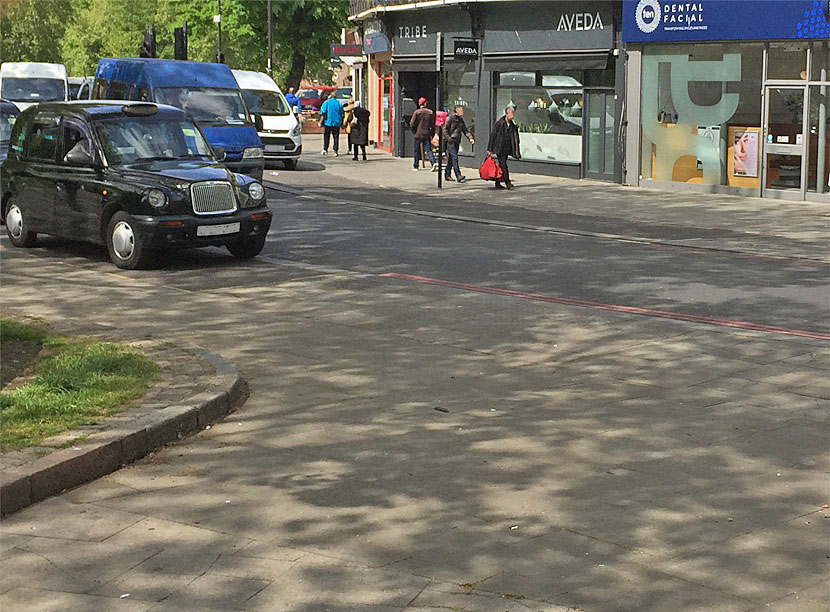
Within 48 hours Dave has been there and captured it to show us how it looks now. (RL)
- Capture 53
- 'Now' required
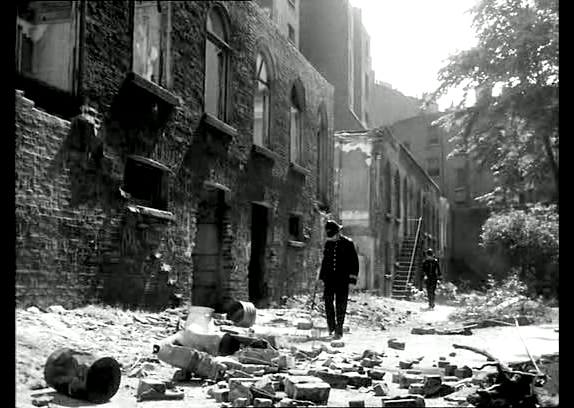
A montage of cut together scenes are seen as the Police scour London looking for clues. This excerpt is from ‘The Blue Lamp’ which was shot two years earlier. This is the site of the present Hallfield estate in Bayswater W2.
- Capture 54
- 23 Jul 2019
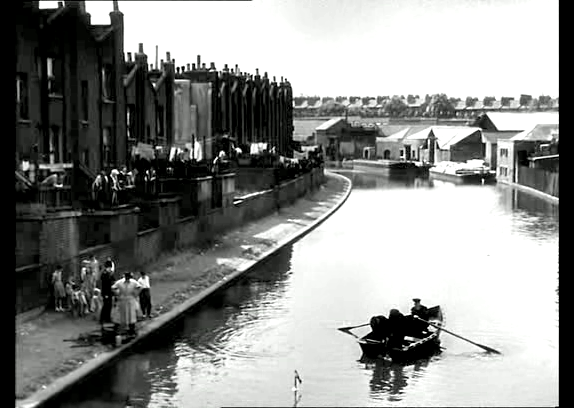
The search continues as Holland and Pendlebury melt the gold and cast it into Eiffel Tower paperweights for sale on the Continent. Another ‘Blue Lamp’ image showing the Paddington Branch of the Grand Union Canal with houses on Clarendon Crescent to the left and the wharves and workshops of Amberley Road on the opposite bank.
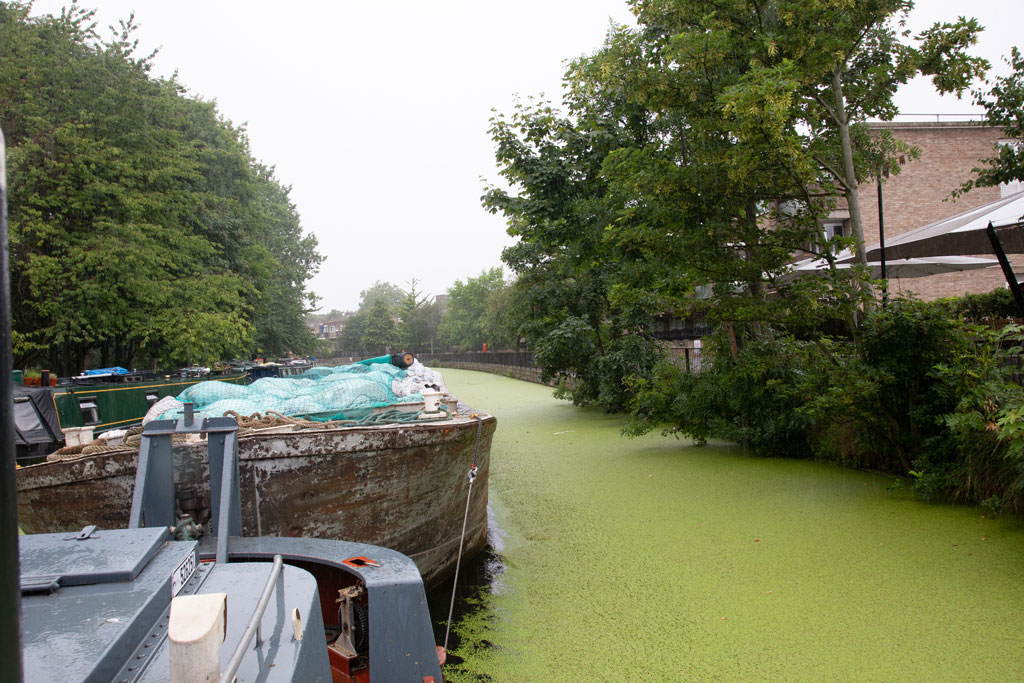
The same scene from water level 68 years with thanks to Elliot and 'iRecycle" for allowing me aboard. (RL)
- Capture 55
- 'Now' required
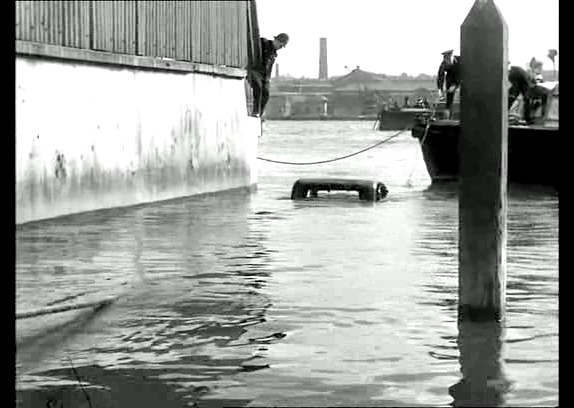
Cars are dragged from the Thames. In a scene taken from ‘Pool of London’, this is Barge House Road E16 which also features in ‘The Sandwich Man’.
- Capture 56
- 'Now' required
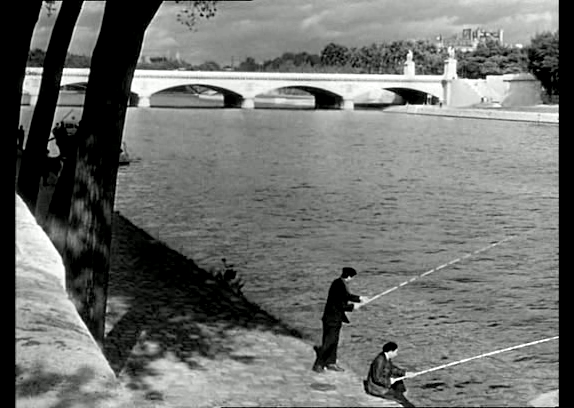
Having shipped the paperweights out of the country, Holland and Pendlebury arrive in Paris. This is the Pont D'Iena which links Trocadéro to the Eiffel Tower. (Steve Randall)
- Capture 57
- 'Now' required
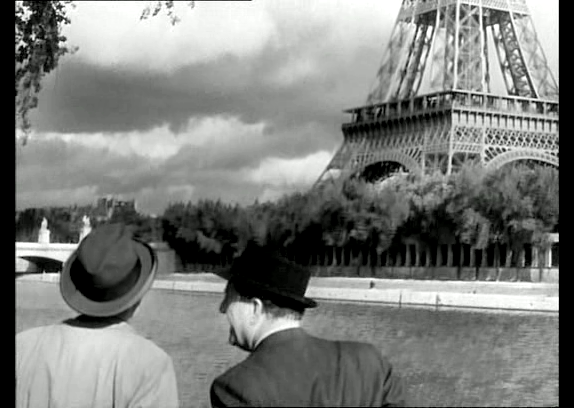
The pair of unlikely crooks admire the view before making their way to the Eiffel Tower.
- Capture 58
- 08 Jun 2019
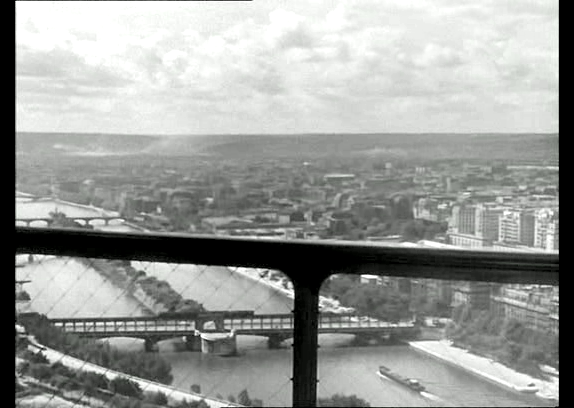
Pendlebury and Holland reach the top of the 1,063 ft tower before visiting the shop where their ‘reserve stock’ of golden Eiffel Towers is being held. The view to the south-west with Pont Bir-Hakeim connecting the 15th and 16th arrondissements and L’Île aux Cygnes to the bottom left.
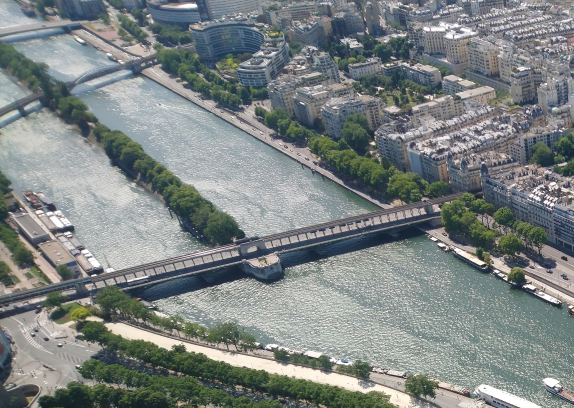
Visitors to the the tower dictate the angle. (PW)
- Capture 59
- 'Now' required
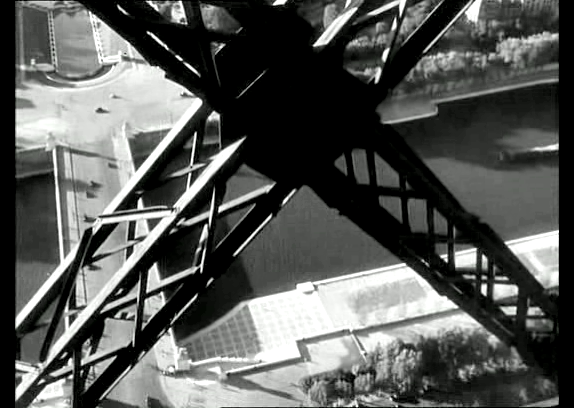
Discovering that the Shop Assistant has sold six of the ‘reserve stock’ to British schoolgirls, the two men run down the stairs to ground level after the lift departs. Looking down on the River Seine with Pont d'Iéna crossing to the right.
- Capture 60
- 'Now' required
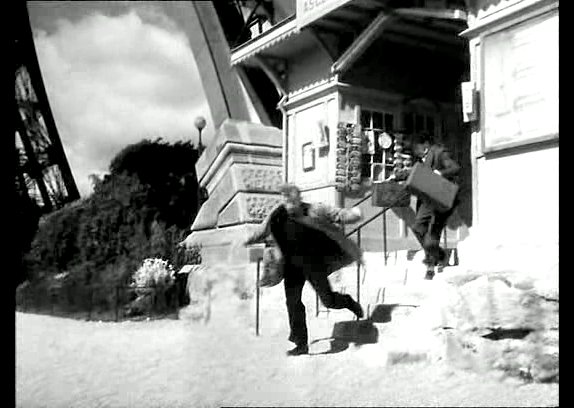
Giddy from their descent, Holland and Pendlebury emerge at the foot of the Eiffel Tower.
- Capture 61
- 'Now' required
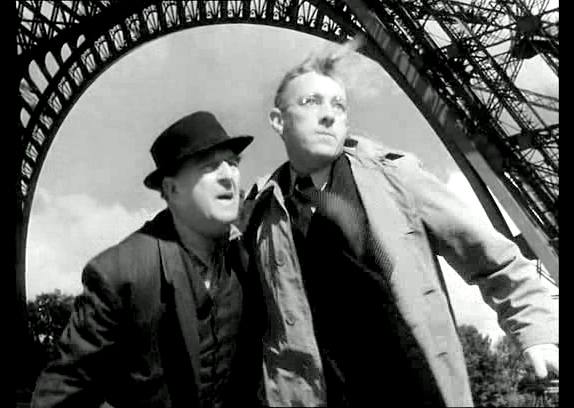
Regaining their balance, the pair watch as the girls get into a taxi. Beneath the Eiffel Tower on Avenue Anatole France, Paris 75007.
- Capture 62
- 'Now' required
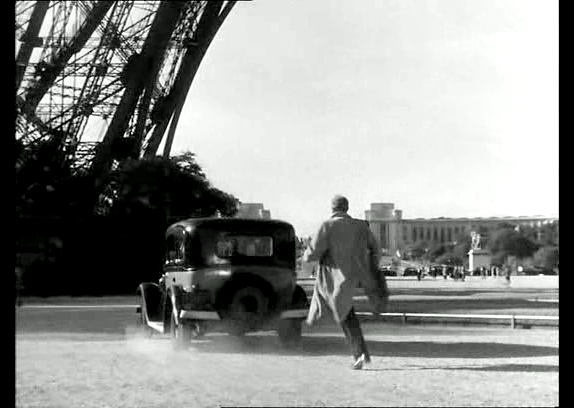
Holland chases after the two tone Renault taking the schoolgirls back to the station and the journey back to England. Facing south from beneath the Eiffel Tower with Place du Trocadéro et du 11 Novembre across the Seine in the distance.
- Capture 63
- 08 Jun 2019
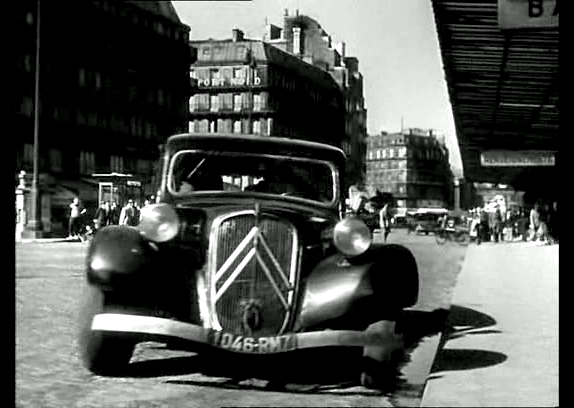
A fast Citroën taxi comes to a halt outside Gare du Nord. Rue de Dunkerque, Paris 75010.
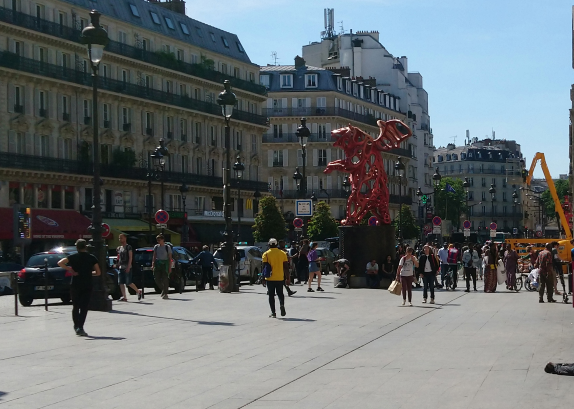
A narrower roadway allows space for street art. (PW)
- Capture 64
- 08 Jun 2019
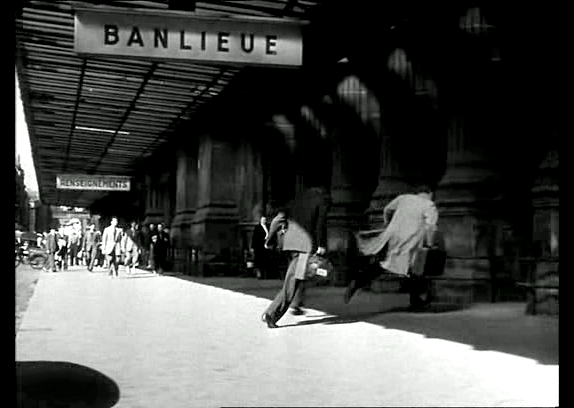
Holland and Pendlebury clamber out of the cab and run into the station. Outside Gare du Nord on Rue de Dunkerque in the 10th arrondissement.
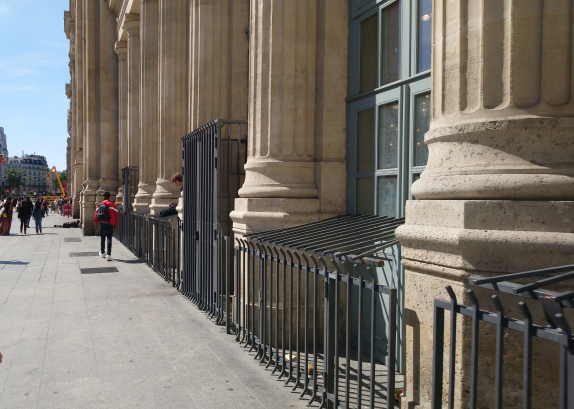
The cleaned up frontage has lost it's canopy. (PW)
- Capture 65
- 'Now' required
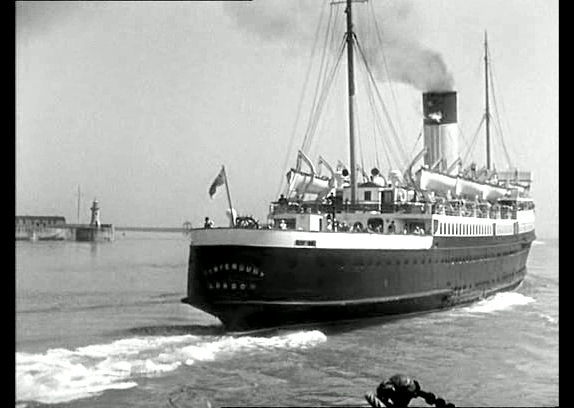
Eventually reaching Calais, the pair watch the ferry carrying the schoolgirls depart for Dover. This is the TSS Canterbury built in 1929 for the Southern Railway’s Golden Arrow service linking London and Paris. At the time of filming, the ship served the Folkestone to Boulogne route and is seen here leaving Boulogne-sur-Mer, Pas-de-Calais.
- Capture 66
- 'Now' required
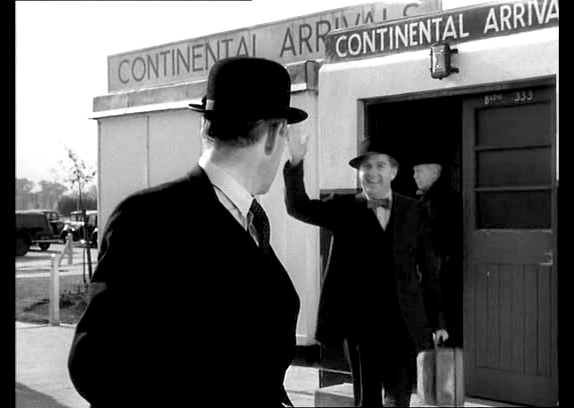
Having returned to England a few days earlier, Holland meets Pendlebury at the airport after he arrives after dealing with important business at the warehouse. RAF Northolt, then in use as Northolt Airport, in Middlesex.
- Capture 67
- 'Now' required
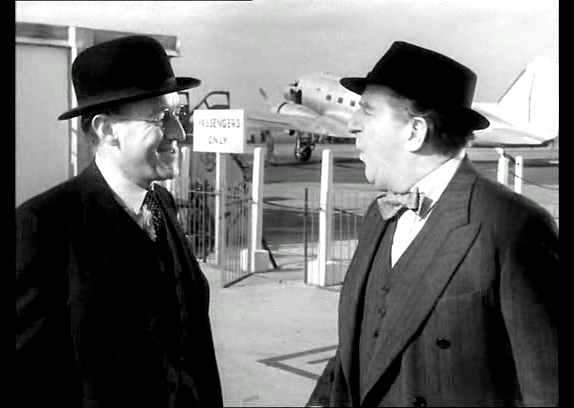
Holland tells Pendlebury that the Police suspect that his van was involved in the robbery. Northolt Airport in South Ruislip to the east of Uxbridge.
- Capture 68
- 'Now' required
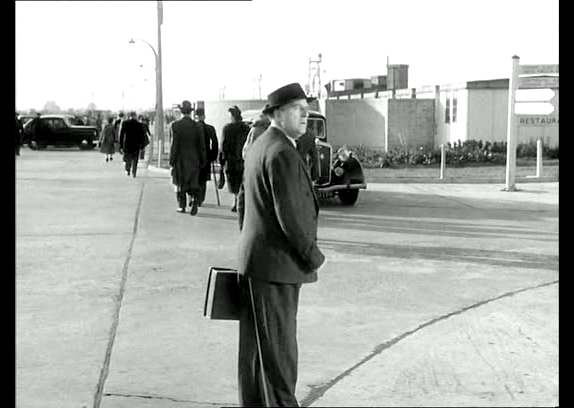
Pendlebury changes his mind after deciding to return to Paris. Northolt Airport handled civilian fights from 1946 until Heathrow opened in 1954. The airfield features in 'Highly Dangerous', ‘Tiger by the Tail’, ‘The Six Men’ and ‘The Teckman Mystery’.
- Capture 69
- 10 May 2019
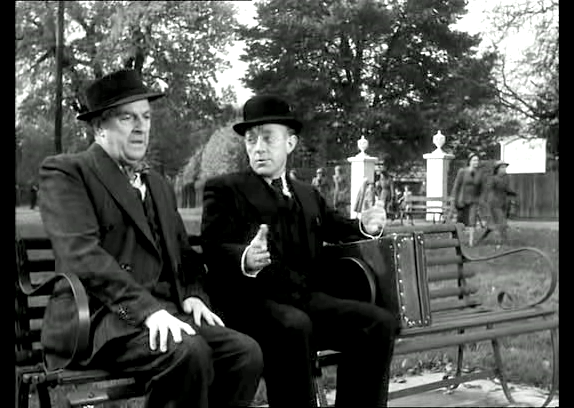
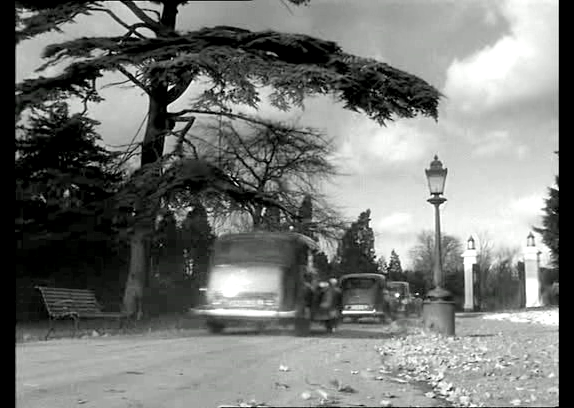
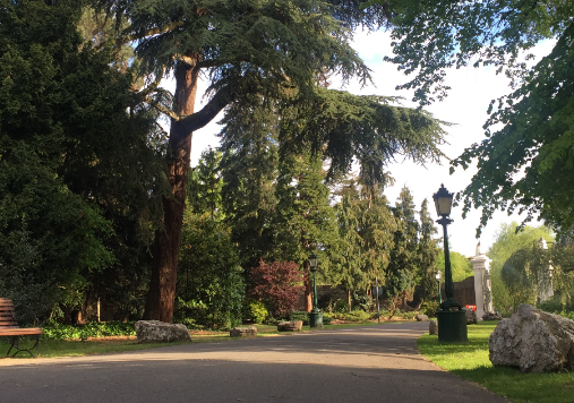
Finalising their plan, Holland and Pendlebury sit across the green from St. Christopher’s School for Girls in the story’s Hendon before entering to obtain the rogue souvenirs from Paris that six of the pupils had bought. This is Turtle Green at the junction of Carlton Road and Castlebar Road in Ealing W5 with the Ancient Oak in the left background.
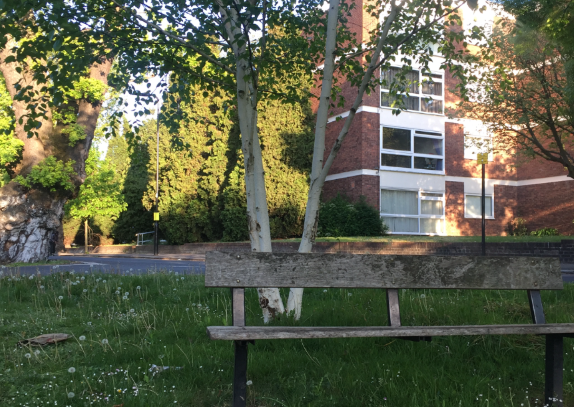
There’s still a bench on Turtle Green in Antony Blair's comparison.
- Capture 70
- 10 May 2019
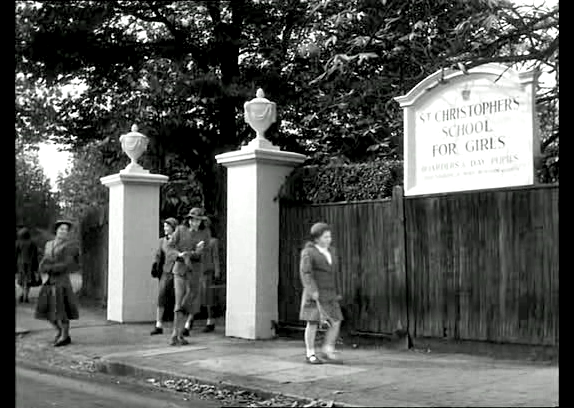
Refusing to return her Eiffel Tower, June Edwards (Alanna Boyce) leaves school at the end of lessons. The entrance to a long demolished property on the west arm of Carlton Road as it joins Castlebar Road.
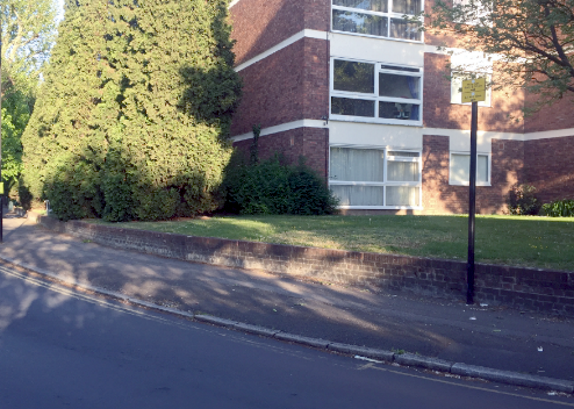
Antony Blair found that this view has changed considerably!
- Capture 71
- 10 May 2019
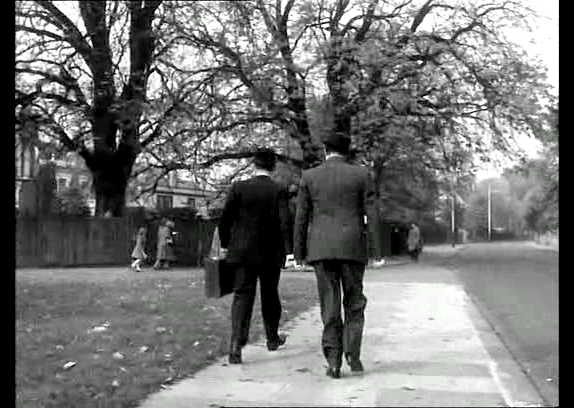
Carrying the five returned towers in a suitcase, the two men follow the youngster. Looking towards the north-west on Castlebar Road.
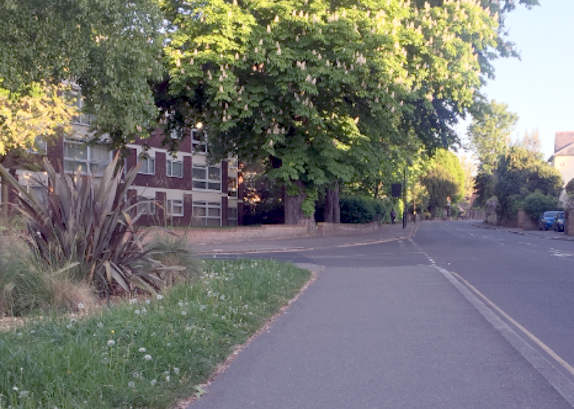
Antony returned to the same location.
- Capture 72
- 10 May 2019
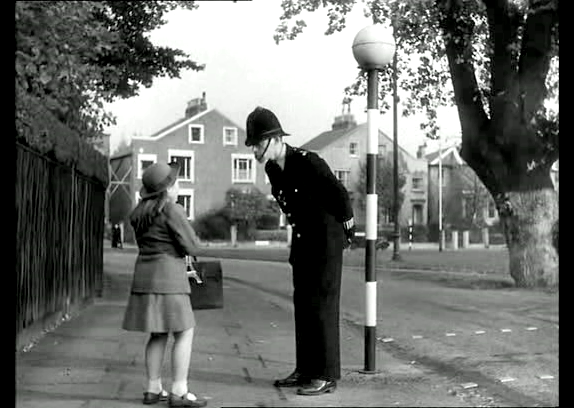
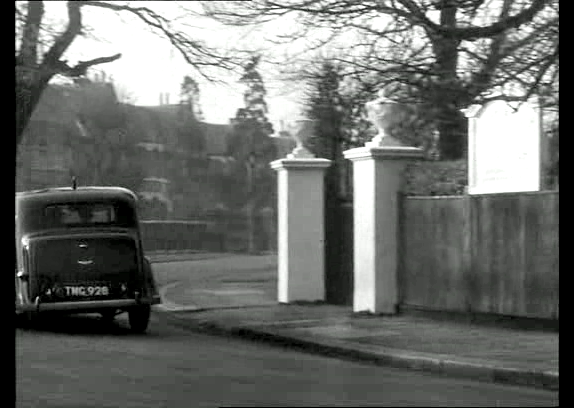
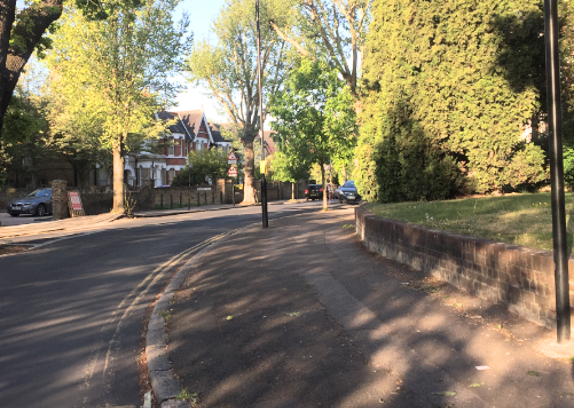
At a pedestrian crossing, June stops to ask a Constable where the ususal Policeman is. Facing the junction of Carlton Road and Castlebar Road in Ealing, Middlesex with the Ancient Oak to the left.
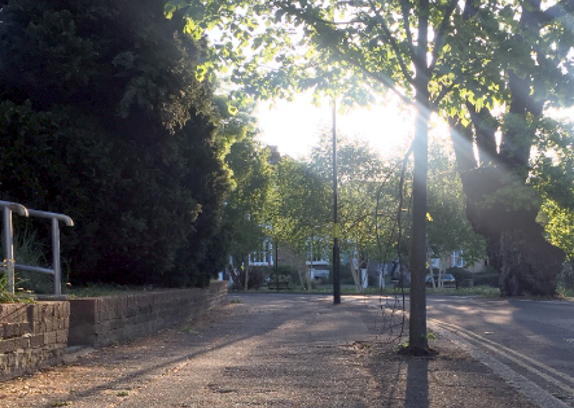
Fighting with sunlight for a shot, Antony Blair notes that the Ancient Oak is in need of a fresh coat of paint.
- Capture 73
- 30 Jun 2011
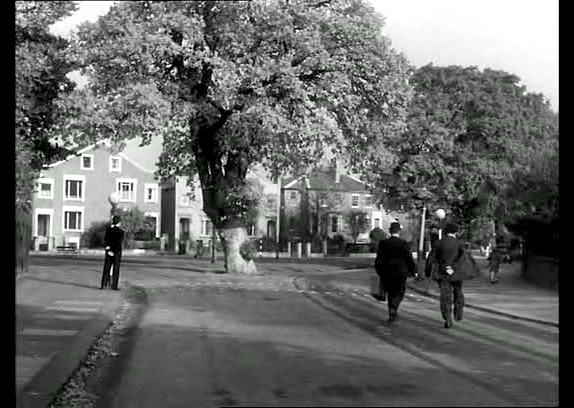
Advised that George is on duty at an exhibition, June heads off to find him, followed by Holland and Pendlebury. Christopher Matheson identifies this as facing Turtle Green at the junction of Carlton Road and Castlebar Road in Ealing W5.
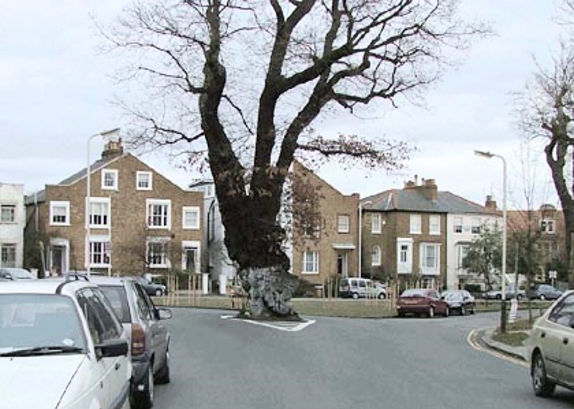
Excellent proof by Paul Wilson.
- Capture 74
- 01 Jan 2008
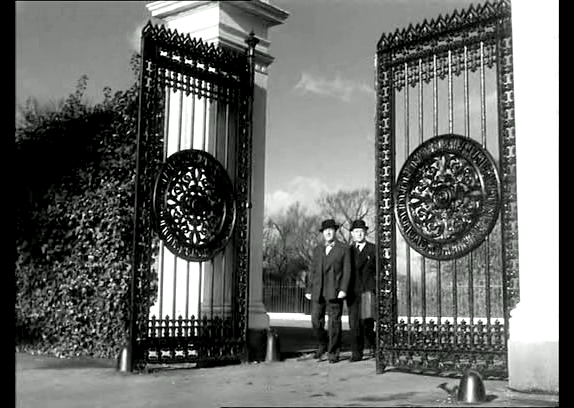
At an imposing gateway, Holland and Pendlebury watch the schoolgirl walk towards the exhibition. The gates at the entrance to Gunnersbury Park on Pope’s Lane opposite Gunnersbury Lane in W5. The gateway can also be seen in 'Here Comes the Sun'.
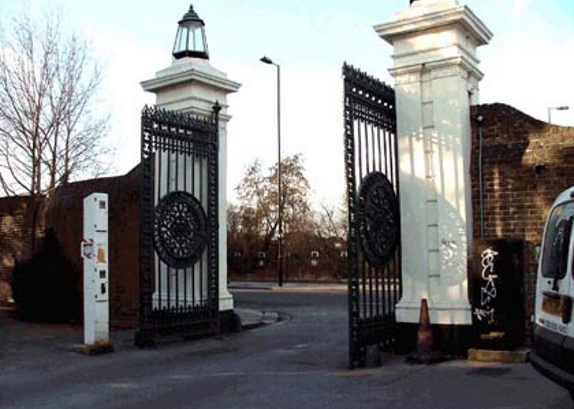
Well shot by Paul Wilson.
- Capture 75
- 10 May 2019
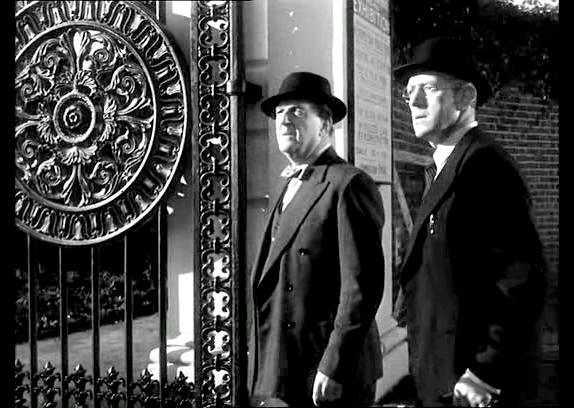
The two men look across at the sign on the gate reading ‘Metropolitan Police Training School’. The gateway to Gunnersbury Park on Pope’s Lane which forms the boundary between Brentford and Ealing.
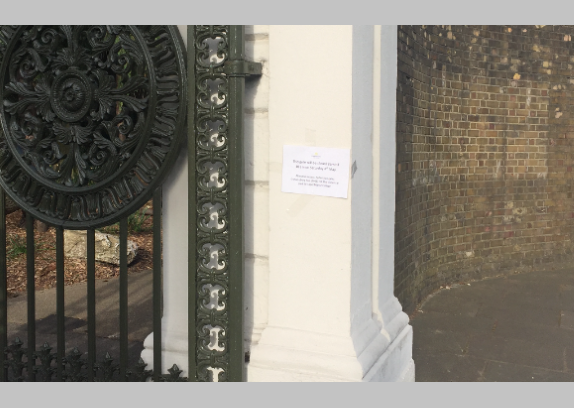
The gateway remains much the same after almost 70 years. Picture by Antony.
- Capture 76
- 10 May 2019
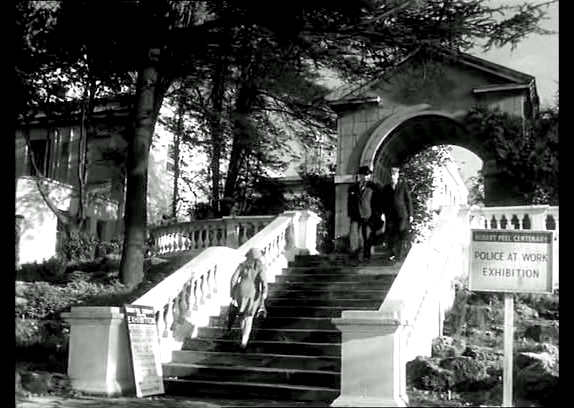
Inside the grounds of the school, June climbs the steps and enters the building where an exhibition about Police work is being held. The steps lead up to the terrace outside Gunnersbury Park Museum in Gunnersbury Park.
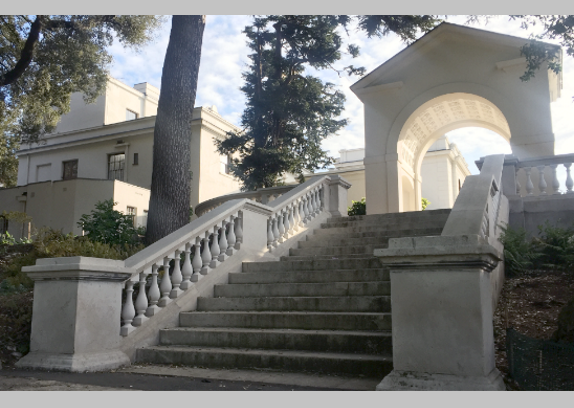
Antony provides this image of the scene today.
- Capture 77
- 11 Mar 2020
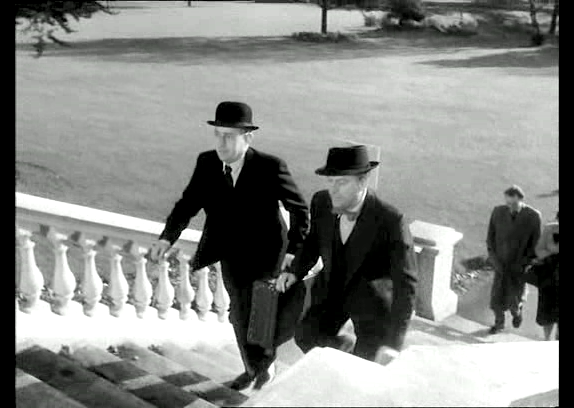
Having no other option, Holland and Pendlebury follow June up the steps. Gunnersbury Park in Brentford, Middlesex.
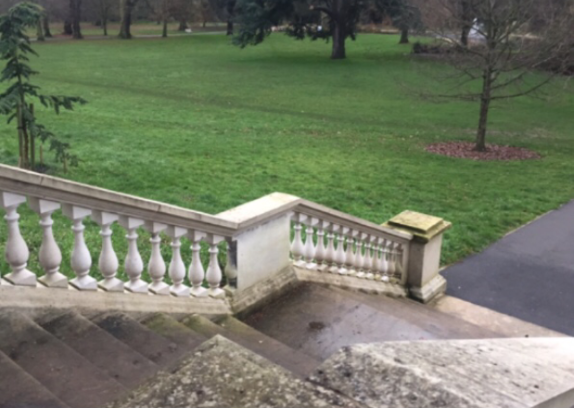
Antony Blair revisits the steps and replaces his earlier shot with this correct one.
- Capture 78
- 10 May 2019
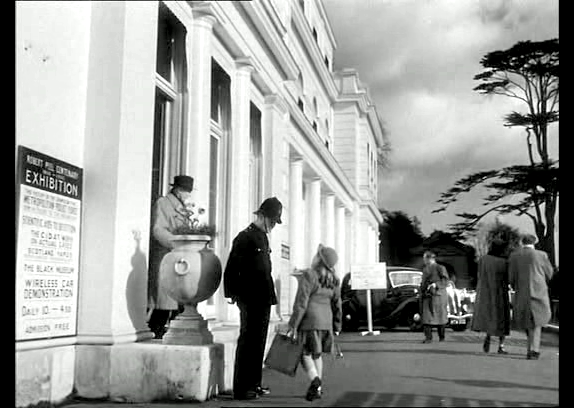
The pair of bullion thieves see the schoolgirl check directions before entering the exhibition hall behind her. The terrace along the southern aspect of Gunnersbury Park Museum.
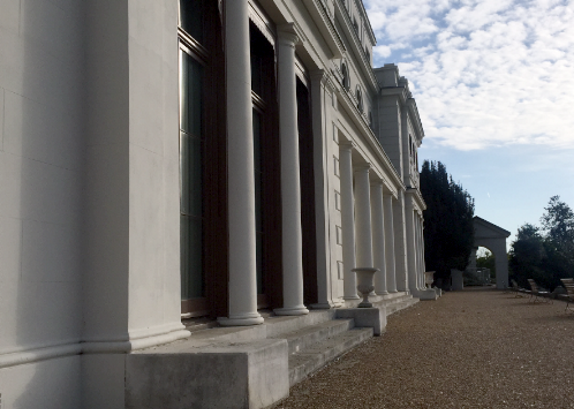
Looking along the back terrace of Gunnersbury house by Antony.
- Capture 79
- 10 May 2019
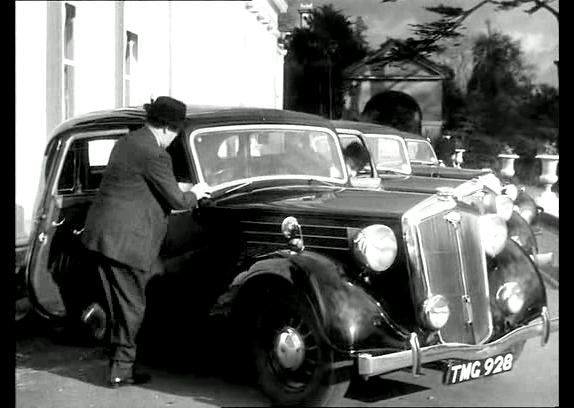
Retrieving the Eiffel Tower in front of a room full of Policemen, Holland and Pendlebury make their escape in a squad car. Outside the Large Mansion that houses the Gunnersbury Park Museum.
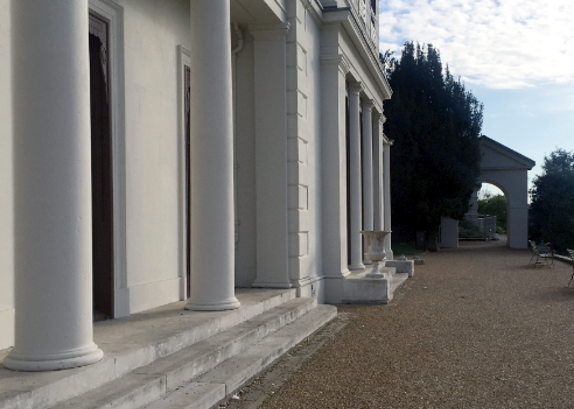
Antony took this shot a little further along the back terrace.
- Capture 80
- 10 May 2019
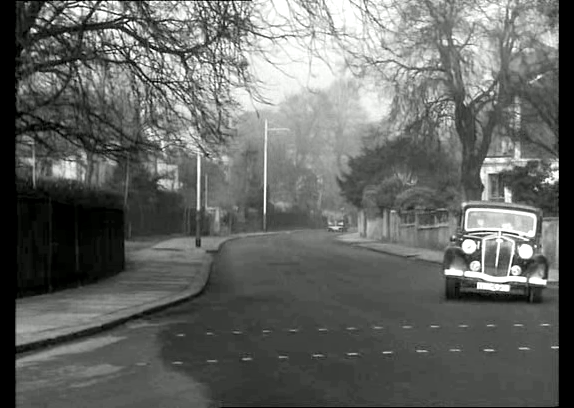
Speeding from the exhibition, the two desperadoes effect a getaway. Castlebar Road at the junction with Carlton Road in Ealing.
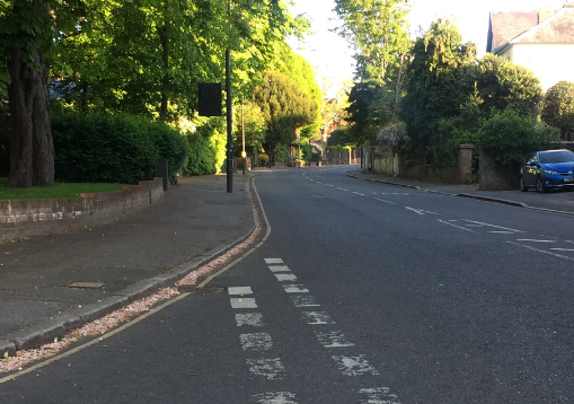
Taken from a similar position by Antony.
- Capture 81
- 10 May 2019
The camera pans with the stolen Wolseley. The western arm of Carlton Road seen from Castlebar Road.
Antony Blair follows the action.
- Capture 82
- 10 May 2019
Running from the hall, Officers leave their stands and exhibits to set off in pursuit of the wanted men. This is the driveway leading from Gunnersbury Park to the exit on Pope’s Lane.
Leaving Gunnersbury Park, Antony records the view "Don’t it look lovely?".
- Capture 83
- 10 May 2019
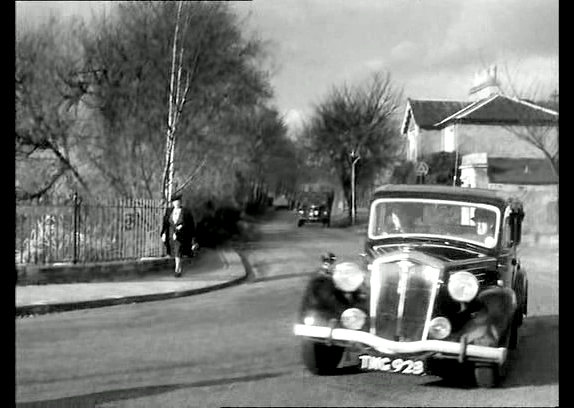
Approaching a junction, Pendlebury swings the car around the corner where a Policeman stands on point duty. The corner of Gunnersbury Drive and Pope’s Lane.
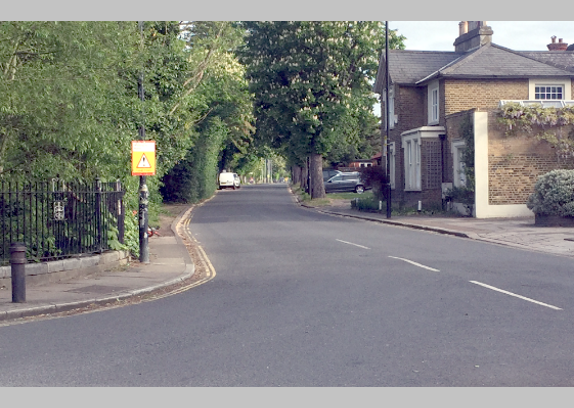
The corner by Barons Pond captured by Antony Blair.
- Capture 84
- 10 May 2019
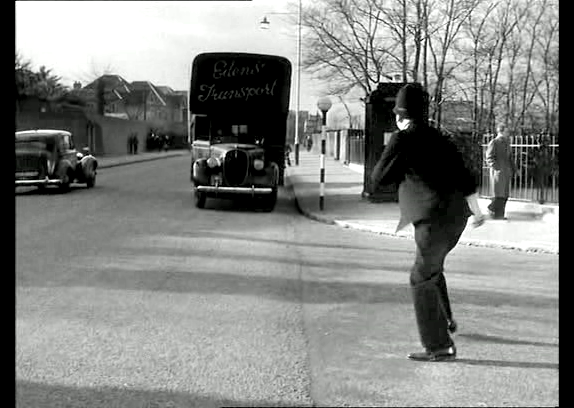
Noting the cars number plate, the Officer runs to call headquarters from a nearby Police Call Box. Looking along Pope’s Lane from the corner of Gunnersbury Drive in W5.
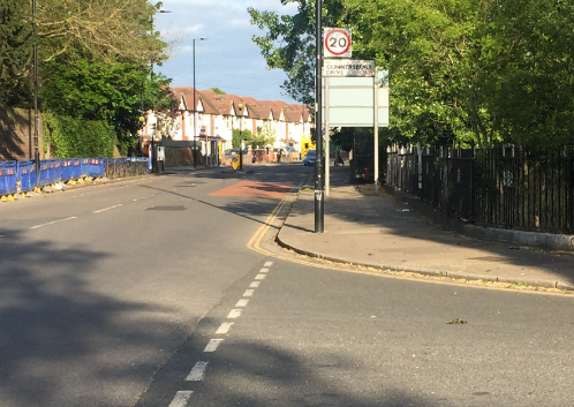
Antony took this shot facing east on Pope’s Lane.
- Capture 85
- 10 May 2019
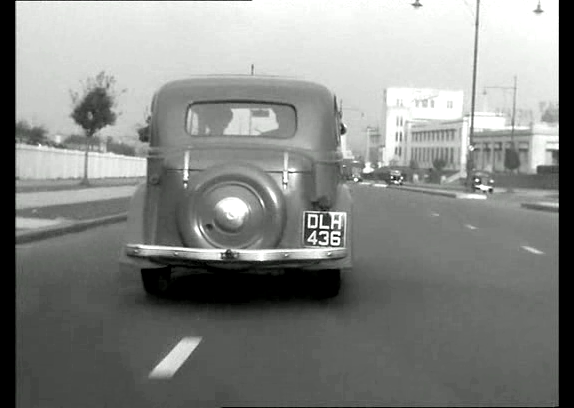
Seeing an opportunity to throw the Police off their tail, Holland radios in that the crooks are driving a grey Vauxhall. Ray Glenister, in a flash, identifies Great West Road in Brentford, approaching the former Pyrene Fire Extinguisher building on the right which is currently occupied by Carpetright.
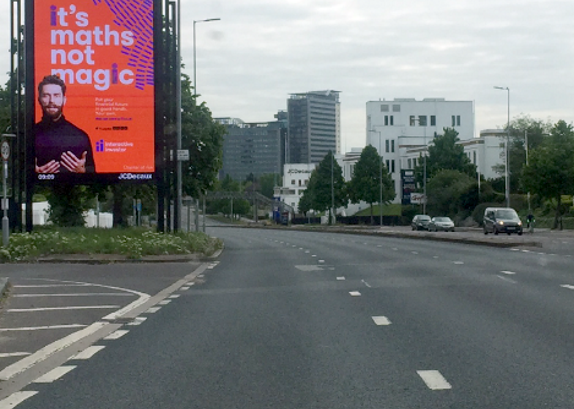
Looking west on Great West Road by Antony Blair who replaces Ray's proving Google image.
- Capture 86
- 01 Jan 2008
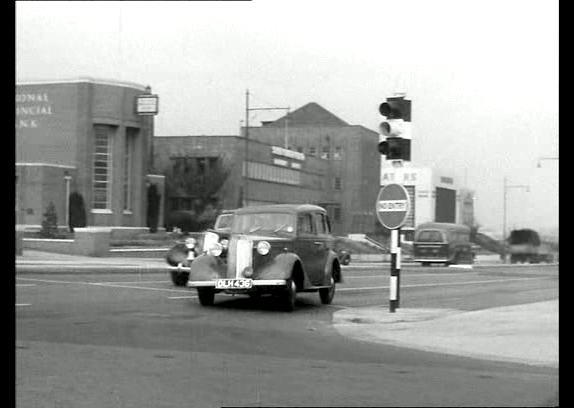
Soon after the erroneous report has been circulated, a Police car catches up with the grey car. Paul Wilson identifies this as Gillette Corner at the junction of Great West Road and Syon Lane in Brentford, Middlesex.
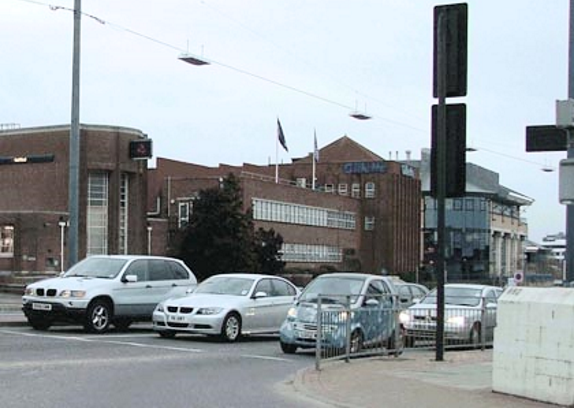
Paul Wilson found the location.
- Capture 87
- 'Now' required
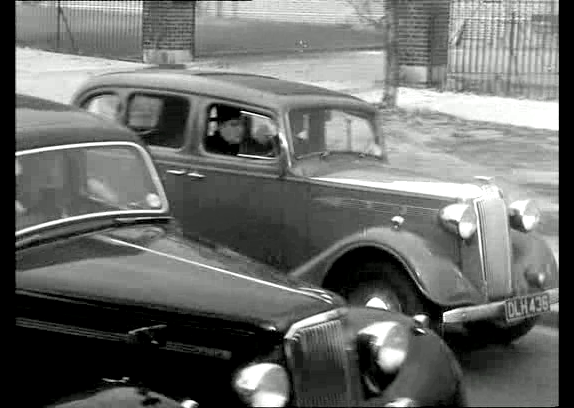
Drawing alongside, Officers shout across for the Vauxhall to pull over. Syon Lane, Brentford.
- Capture 88
- 01 Jan 2008
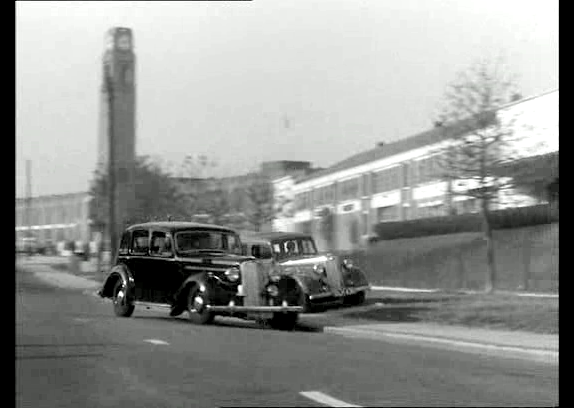
The Police car veers to the left, forcing the target vehicle onto the verge. In the background stands the Gillette Building at the corner of Syon Lane and Great West Road. The art deco offices and works also appear in ‘Radio On’ and from a distance in ‘A Run for Your Money’.
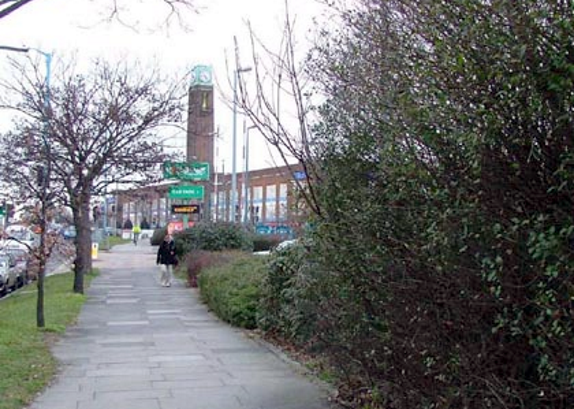
Paul Wilson again, with a sharp eye and sharp lens.
- Capture 89
- 09 Oct 2019
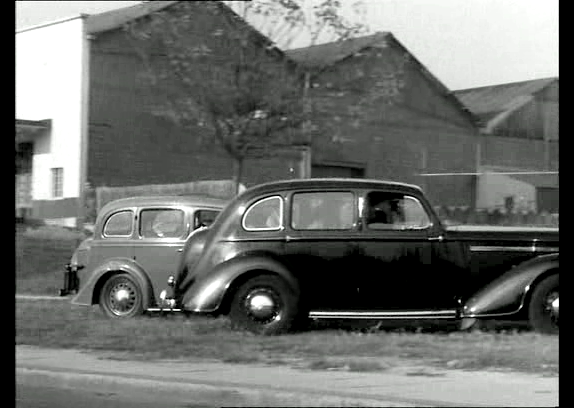
Police swarm from the car and arrest the surprised Clergyman in their Vauxhall. Syon Lane in Brentford, Middlesex.
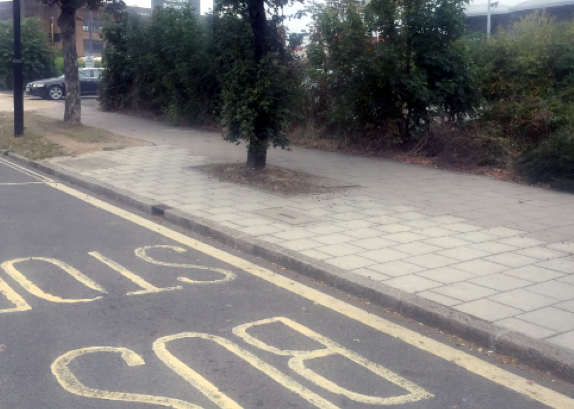
Antony found that the grass verge where cars came to a rest has since been paved over as part of a bus stop.
- Capture 90
- 'Now' required
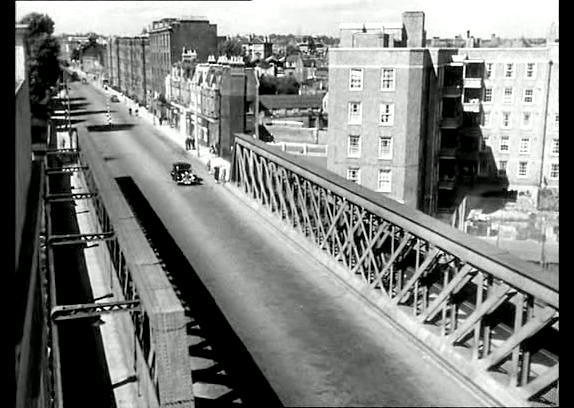
Another from ‘The Blue Lamp’, this time of the bridge taking Ladbroke Grove over the Great Western Main Line in W10 with Octavia House on Southern Row standing to the right.
- Capture 91
- 'Now' required
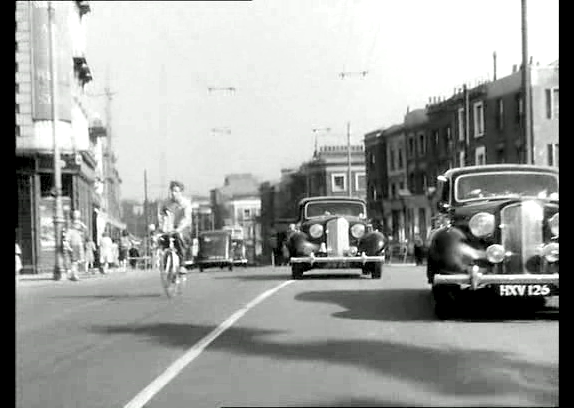
Police wireless cars head to converge on the crooks. This speeding vehicle to the centre is taken from ‘The Blue Lamp’.
- Capture 92
- 'Now' required
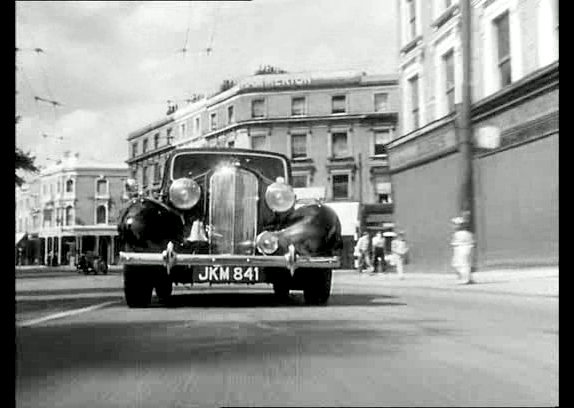
This is the Harrow Road sequence that appears beneath the titles for ‘The Blue Lamp’. The corner to the right is Sutherland Avenue with Maryland Road in the left distance.
- Capture 93
- 'Now' required
Harrow Road in W2 with Bishops Bridge Road to the left.
- Capture 94
- 21 Jun 2019
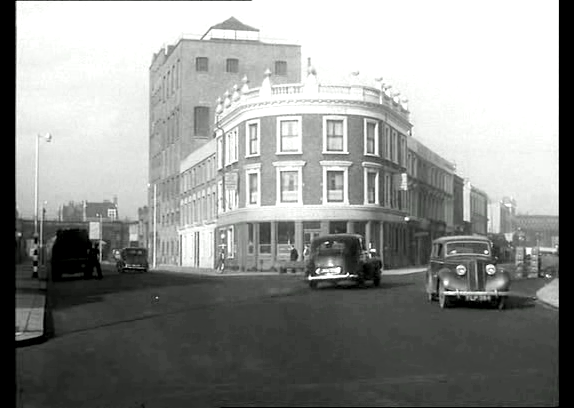
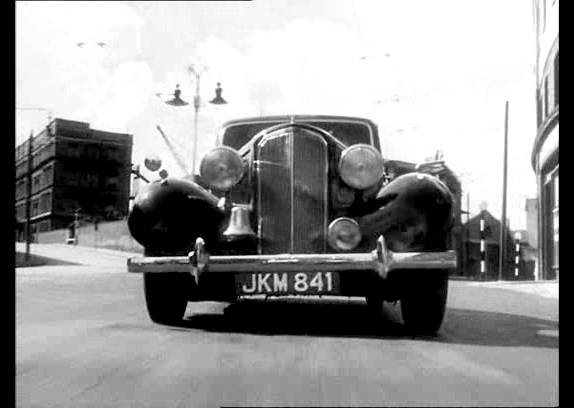
Holland and Pendlebury keep up their pace through West London. Facing The Bramley Arms at the corner of Latimer Road and Bramley Road in W10. The location is also seen in ‘Operation Third Form’, ‘The Squeeze’, ‘Quadrophenia’, ‘Sid and Nancy’ and of course ‘The Blue Lamp’.
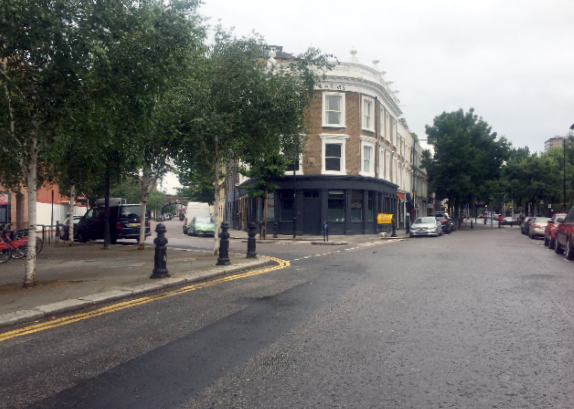
The former pub seeks refuge behind the trees in Antony Blair's modern shot.
- Capture 95
- 21 Jun 2019
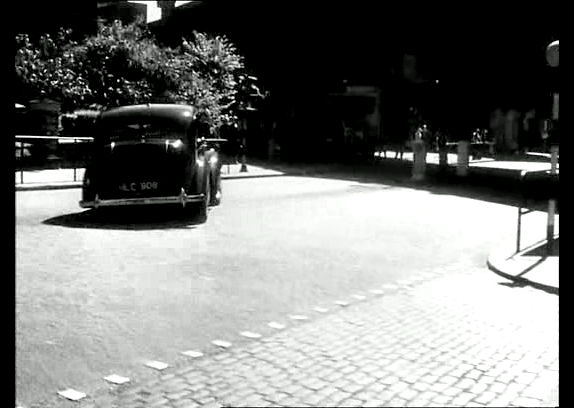
A dark capture that's possibly the junction of Martin Street, now Shalfleet Drive, and Bramley Road with the bridge carrying the Hammersmith & City Line and Latimer Road station to the top right.
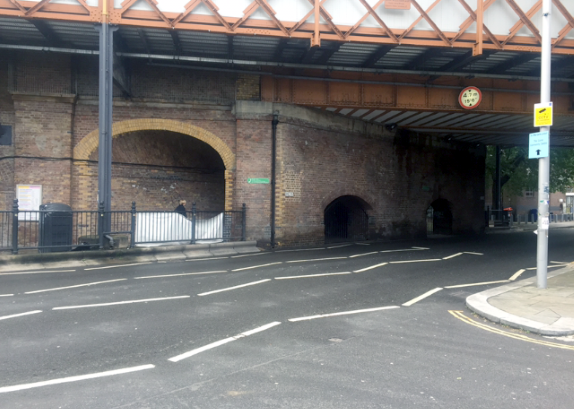
A clearer view of the same junction from Antony.
- Capture 96
- 18 Jan 2020
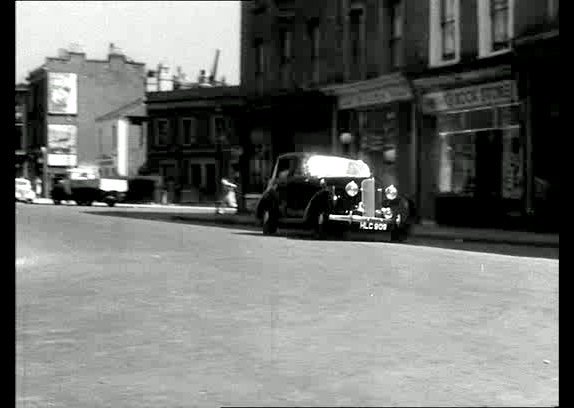
Bramley Road with the corner of Treadgold Street to the left of centre. The junction is seen from the other direction in ‘Who Done It?’
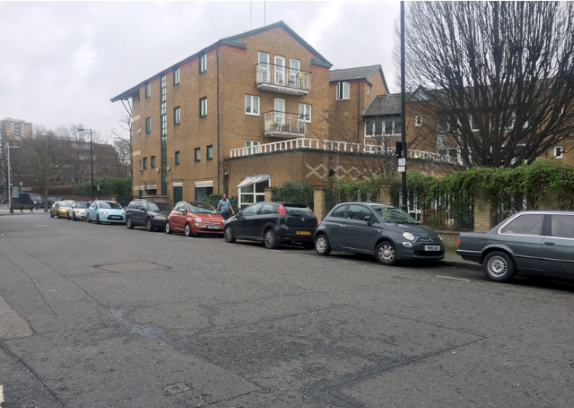
Not one original building left in Antony's view.
- Capture 97
- 21 Jun 2019
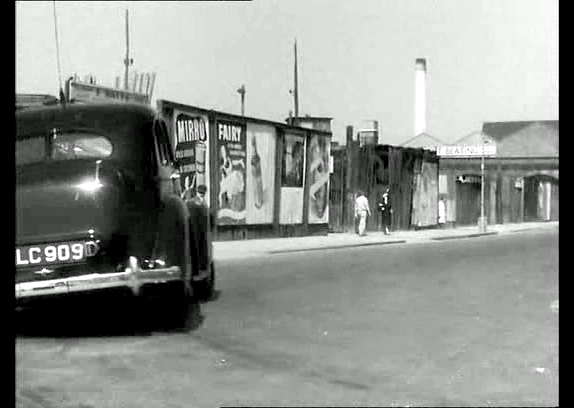
Latimer Road seen from the corner of Bramley Road with the Devon Dye Works beyond the Hammersmith & City Line viaduct.
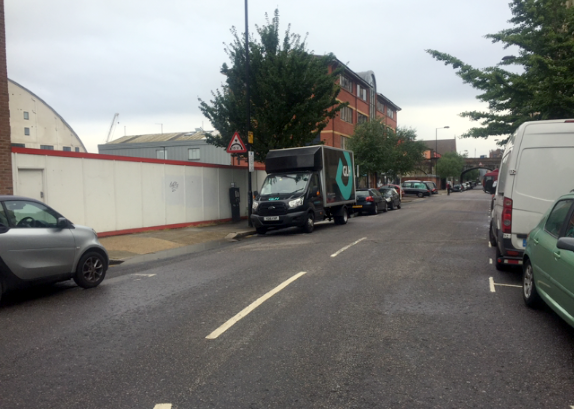
A more cluttered view now as Antony Blair faces north west on Freston Road.
- Capture 98
- 18 Jan 2020
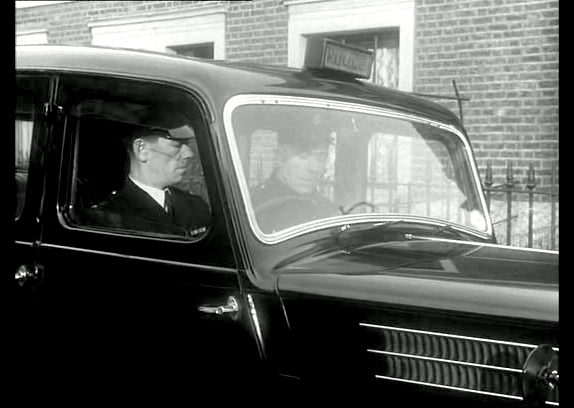
Another wireless car receives the message from headquarters. The background properties stand on Bramley Road at the corner of Treadgold Street.
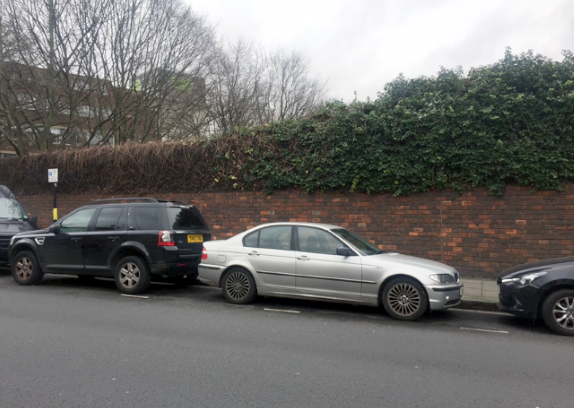
Antony found that 28 and 30 Bramley Road have been replaced by a boring wall.
- Capture 99
- 21 Jun 2019
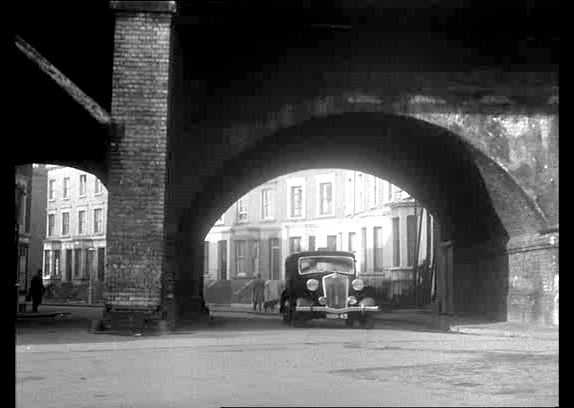
The Driver accelerates away. Looking through the bridge carrying the Hammersmith & City Line through Latimer Road station with houses on Lockton Street in the background.
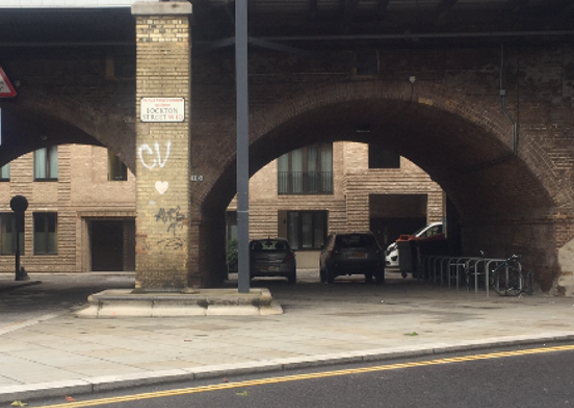
The scene as the car speeds under the bridge, recreated by Antony Blair.
- Capture 100
- 21 Jun 2019
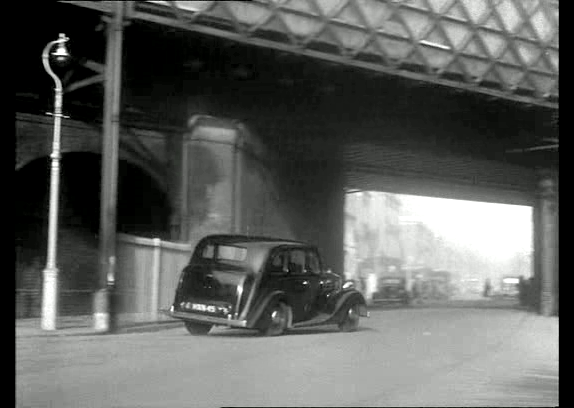
Panning with the action, the shot follows as the car turns to pass beneath the railway bridge over Bramley Road. This bridge is also seen in ‘Otley’ and ‘Cassandra’s Dream’.
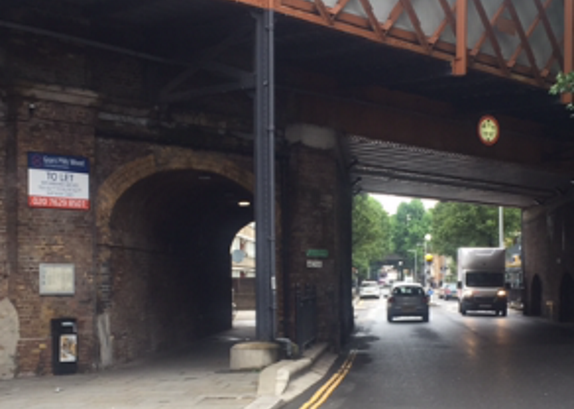
Antony looks north beneath the bridge.
- Capture 101
- 'Now' required
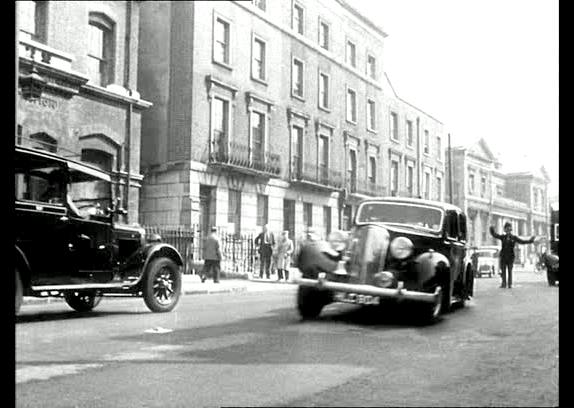
More Police cars are dispatched. Another ‘Blue Lamp’ hand me down showing Harrow Road W2 with Paddington Green Police Station to the left and Paddington Town Hall in the right distance.
- Capture 102
- 'Now' required
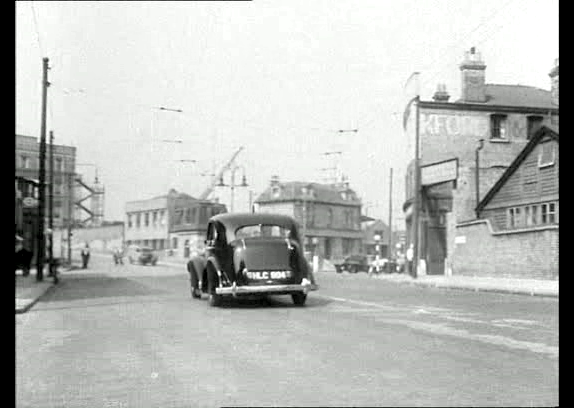
The sequence continues with the car heading towards the junction of Harrow Road and Bishop's Bridge Road.
- Capture 103
- 21 Jun 2019
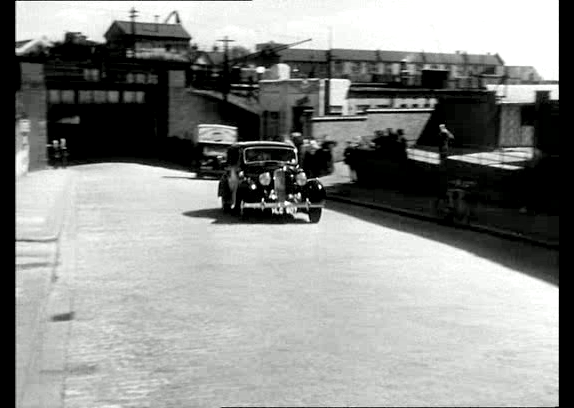
Hythe Road in White City NW10, again reused from ‘The Blue Lamp’.
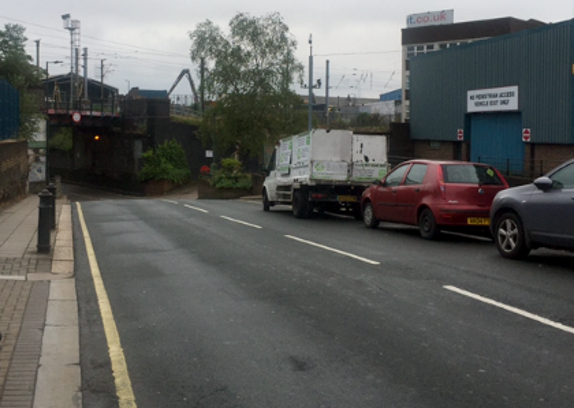
The same location by Antony Blair.
- Capture 104
- 21 Jun 2019
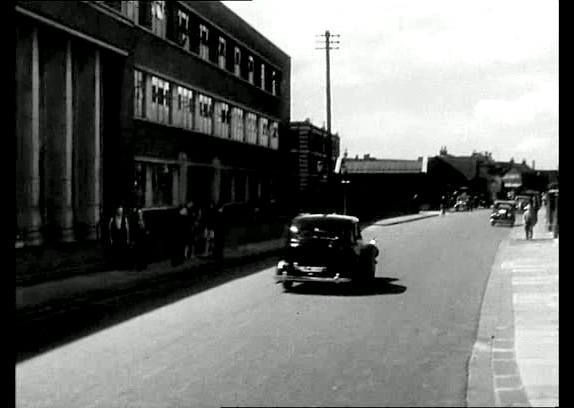
Panning brings the other end of Hythe Road into view, looking towards a location seen in ‘10 Rillington Place’.
Antony Blair provides this comparison.
- Capture 105
- 18 Aug 2019
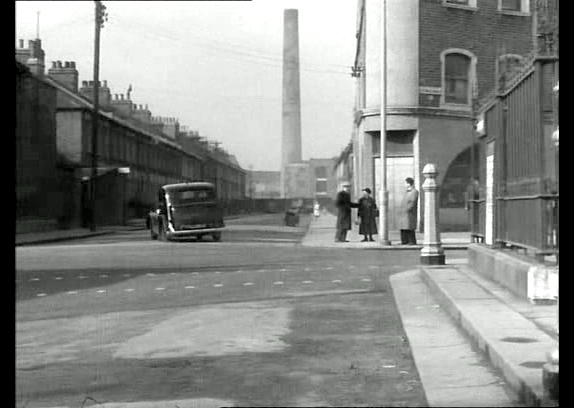
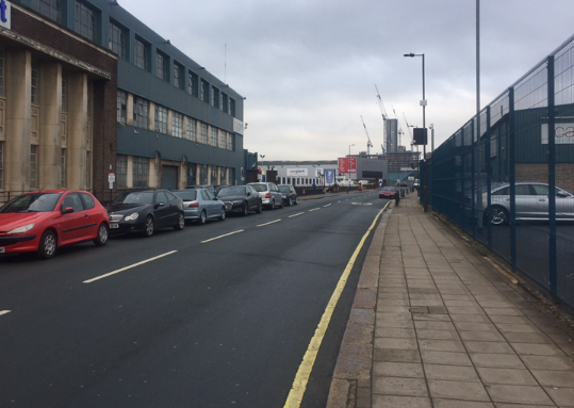
The chase continues. Looking across Latimer Road from Rifle Place along Stebbing Street. The chimney in the distance belongs to the Insulated Cables research laboratories and Rifle Place also appears in ‘Otley’ and ‘Robbery’.
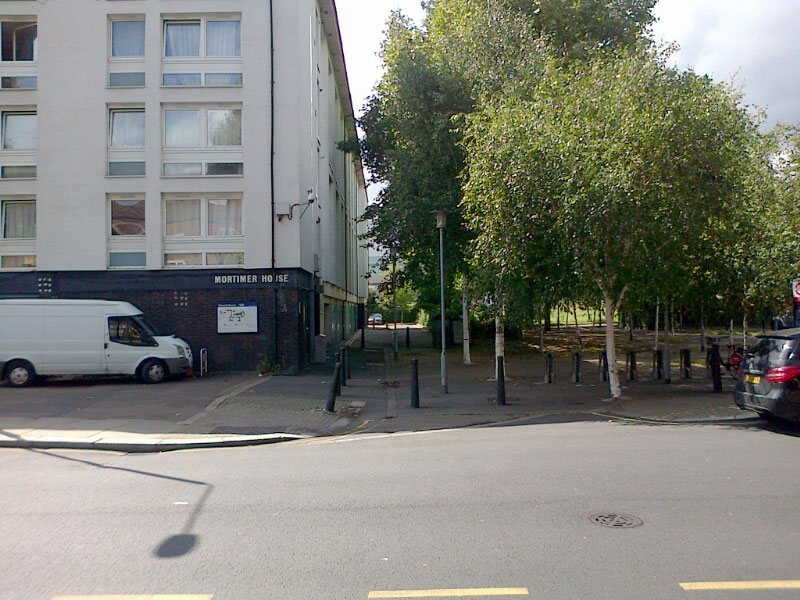
A rather changed scene provided by John Wilkinson and confirmed by an elderly local as to the exact spot where Stebbing Street (a cul-de-sac) junctioned with St Ann's road. John further advises that Number 1 Stebbing Street was also the premises of the 'Easifit Change-over Company' who manufactured cinema projector change-over equipment for many years; an odd coincidence! (RL)
- Capture 106
- 21 Jun 2019
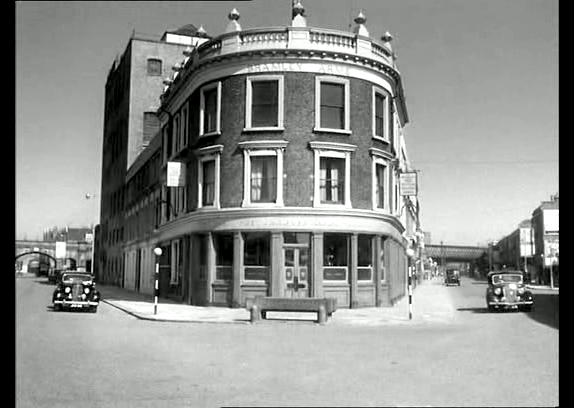
Two Police cars head to towards a blind junction. The Bramley Arms at the junction of Latimer Road, since renamed Freston Road, and Bramley Road.
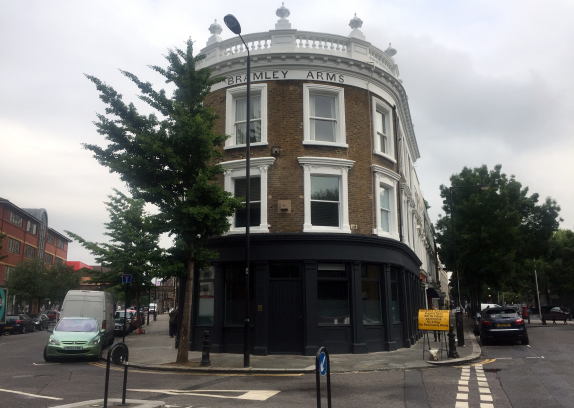
As the can be seen in Antony's view, this is the former Bramley Arms public house.
- Capture 107
- 'Now' required
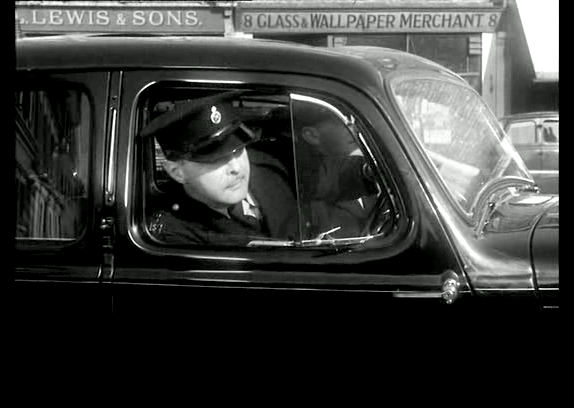
One of the Police drivers assesses the damage after the two vehicles collide. This appears to be at the junction of Latimer Road and Bramley Road with number 8 Bramley Road in the background.
- Capture 108
- 21 Jun 2019
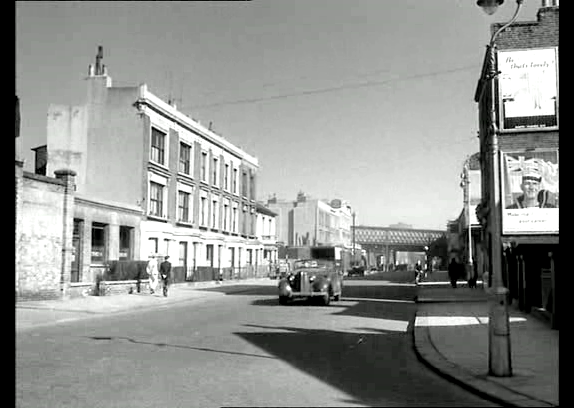
Distracted by a tune playing on his car radio, a Travelling Salesman crashes into the pile up. Looking north along Bramley Road from the corner of Treadgold Street in Notting Hill.
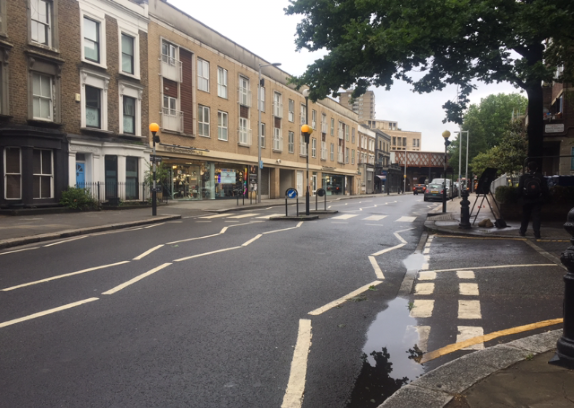
Antony Blair captured the same scene with added buildings.
- Capture 109
- 18 Jan 2020
The antennas of the two cars entwine, sending music into the Police broadcast system. The curved building to the right is The Trafalgar public house at number 2 Bramley Road W10.
A much changed scene greeted Antony on Bramley Road with The Trafalgar long demolished.
- Capture 110
- 05 May 2019
A Policeman (David Davies) appears in the street ahead. Facing north to the junction of Bread Street and Cannon Street with buildings on Cheapside crossing the background and the now lost St. Mary Aldermanbury church in the right distance. The junction also appears in ‘The League of Gentlemen’ and the street beyond, around Watling Street, also feature in ‘Mantrap’, ‘The Oracle’, 'Stage Fright' and ‘Kaleidoscope’ as well as ‘His and Hers’.
Let's be honest, it could be worse. (PW)
- Capture 111
- 05 May 2019
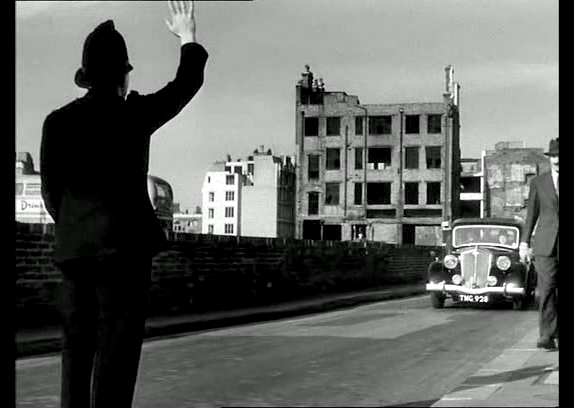
Stopping Pendlebury and Holland, the Officer asks for a lift to a distant Police Call Post where the blue light is flashing. This is facing the same way as the previous capture on Bread Street in London EC4.
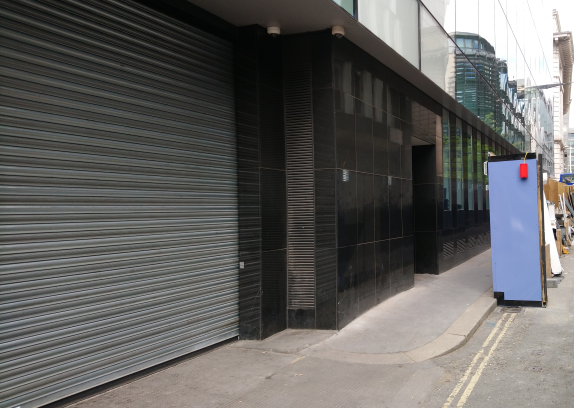
Not that much to see nowadays. (PW)
- Capture 112
- 04 Jan 2012
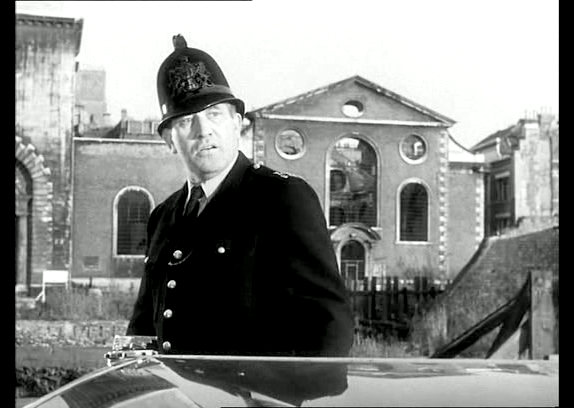
The Policeman stops in his tracks when he hears a radio message. Looking across from Bread Street to Bow Church Yard with St. Mary-le–Bow in the background recognised by Edward Shum.
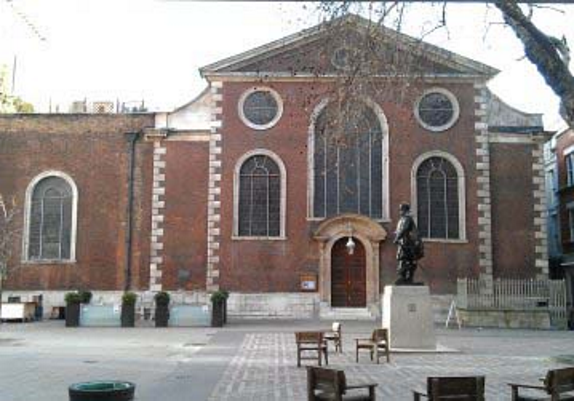
Modern view submitted by Edward Shum.
- Capture 113
- 04 Jan 2012
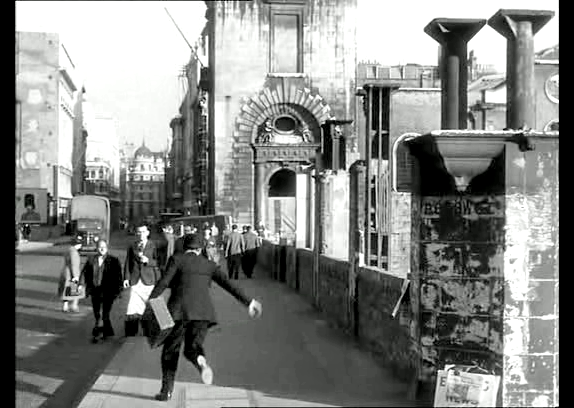
Grabbing the suitcase from the back of the car, Holland runs towards the nearest Underground station. Looking east along Cheapside from the corner of Bread Street. Identified by Edward Shum.
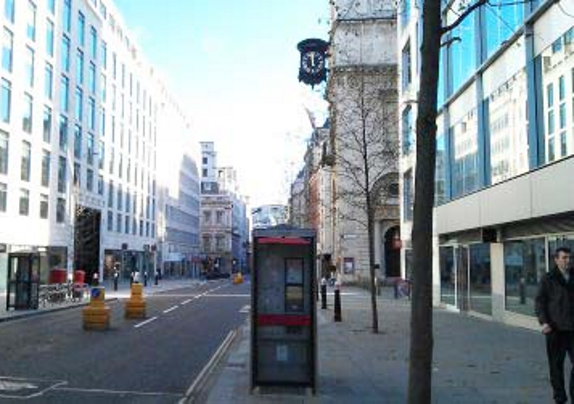
Edward also provides this comparison.
- Capture 114
- 06 Sep 2008
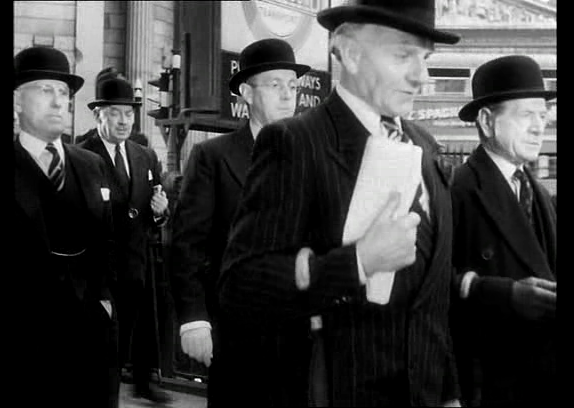
Holland concludes his story to the Detective arresting him in South America with “Instead of changing as usual at Charing Cross, I came straight on to Rio de Janeiro”. Once again, this is the entrance to Bank Underground station at the corner of Prince’s Street and Mansion House Street in EC2.
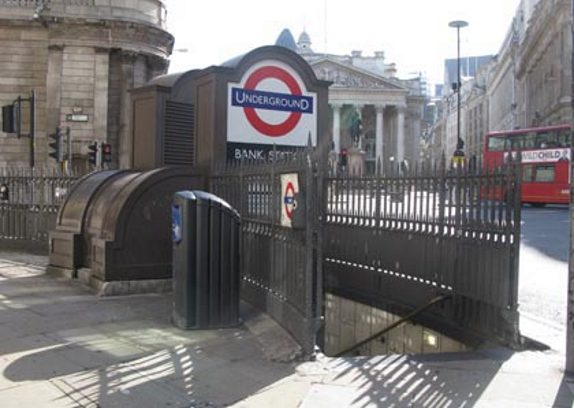
Simon James captures the location.